How Can I Burn a DVD on My Macbook Pro/Air

If you are a Macbook user who collects lots of videos and at the time when you prefer to watch the movie on a DVD player but it just confuses you that Mac doesn't support iDVD anymore. No worries, the good news is that iTunes, a default program of Mac, has a built-in creator to help you burn your videos to DVD. What's more, we review and pick up the most useful DVD creator to enable you to burn DVD on Macbook.
Contents

Ultimate Guide on Burning DVD on Macbook

To burn DVD on Macbook, you need a DVD creator, and the VideoSolo DVD Creator is quite suitable for you. It is very user-friendly, you can edit and customize your DVD on the way you like and create a unique DVD for your video. This program is equipped with the following features:

  • Convert and burn all formats of videos to DVD;
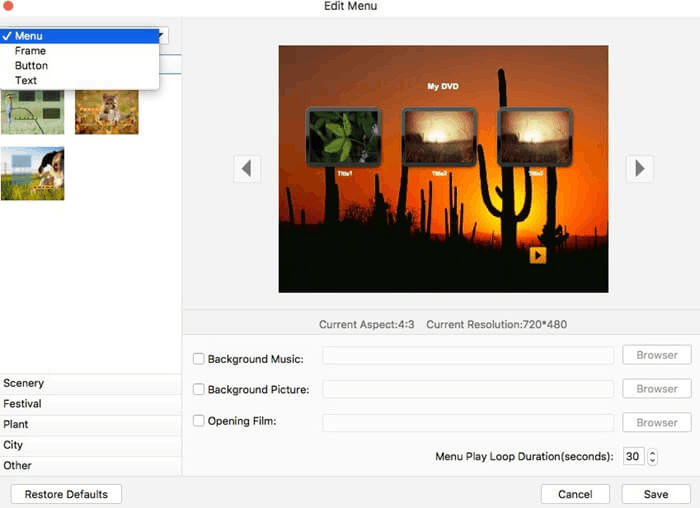
  • Provide multiple choices of DVD menu templates to personalize your DVD;
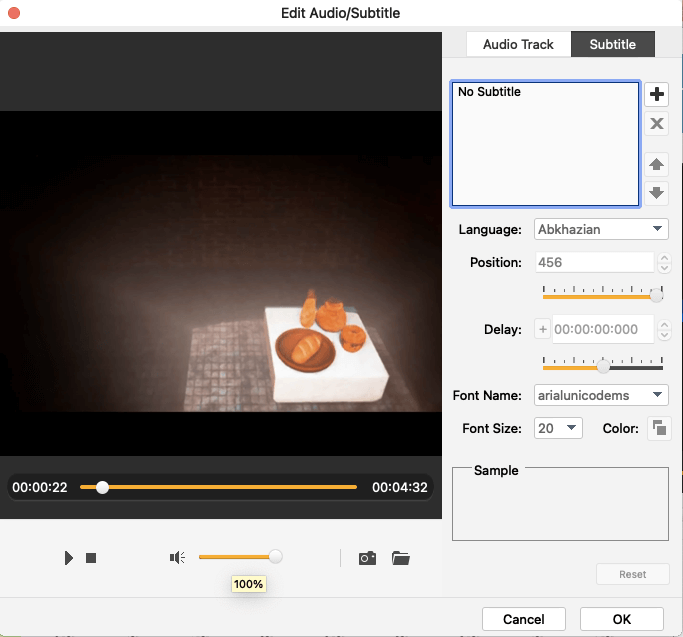
  • Customize subtitles and audio track;
  • Edit video effects to create professional DVD;
  • Preview your DVD before burning;

Step 1. Launch the Program and Add Videos

Launch the program, there will be an interface pop up with "Add Media Files", click the button and add the videos you want to burn.
Add Files Mac

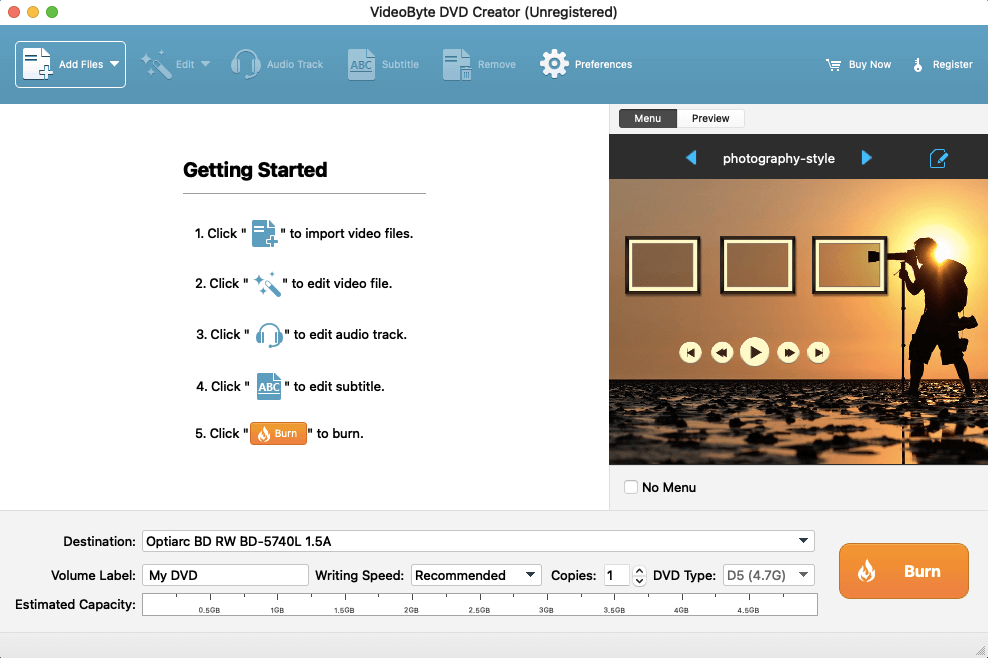
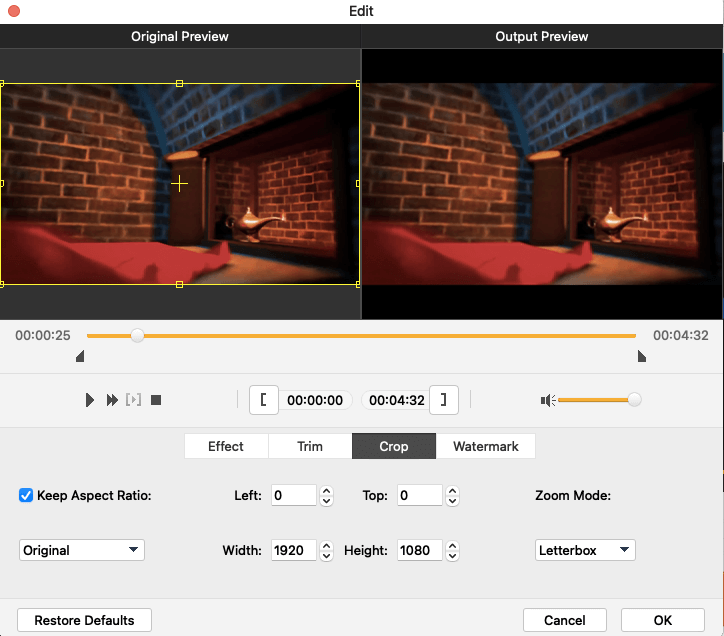
Step 2. Personalize the Videos

First, you can click the "Edit" button and modify the video effect like brightness, saturation and video length, and even add watermark as you like.
Creator Edit Mac
Second, if you want your video to be more attractive, add subtitles and audio tracks and adjust other parameters like transparency and position.
Add Edit Subtitle Mac
Last but not least, edit the Menu Templates. After the basic editing, select a wonderful theme for your video from the preset menus. You can change the background picture and add background music to your DVD.
Menu Option Mac

Step 3. Burn A DVD on Macbook

Press "Next" icon at the bottom right corner to edit wedding video DVD menu. At the left side, you can see menu template in various style such as holiday, wedding, family, travel and so on, just select wedding menu or others you like. You can also change the title subject and add background music & opening film to your videos at the bottom.

Burning DVD Mac

Use iTunes to Create DVD on Macbook

To use iTunes to create DVD on Macbook, you need to know whether your Mac has a built-in optical drive, or if you connect an external DVD drive (for example, an Apple USB SuperDrive), you can burn a DVD on Macbook.

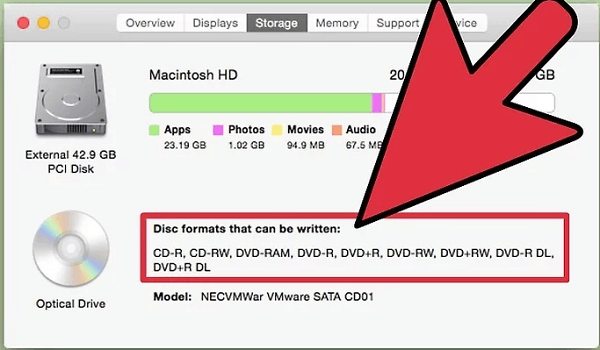
1. Check the system information of your Macbook

Some old Macs are not equipped with built-in optical drive, so they can not read DVDs. Go to the "System Information" of your Macbook and check if DVD can be read. If there appears "DVD-R" or "DVD-RW", you can burn DVDs on Mac.
Macbook System Information

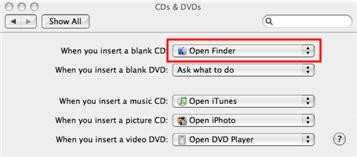
2. Insert a blank DVD

After you insert a blank DVD, there will be a dialog pop up, choose "Open Finder". Select "Make this action the default" so you can open the Finder every time you insert a blank disc. The DVD icon appears on your desktop.
Open Finder

3. Rename the DVD

Click once on the DVD's icon on the desktop, then click once again on "Untitled DVD" so that the text is selected (do not double-click as that will open the CD). Once the text is selected, start typing some different text to give the DVD a new name.

4. Arrange the files
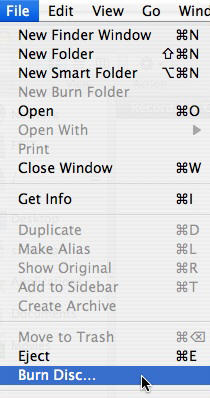
Double-click the DVD icon to open it, drag the files you want to burn into the DVD. The names of files, folders, and the DVD can't be changed after the DVD is burned.

5. Burn a DVD

Choose File > Burn Disc or click on the Burn button in the upper right corner of the Finder window. Then select the burn speed and click burn to begin burning the DVD.
Itunes Burn Disc

Here are the two ways to burn DVD on Macbook, have you got them? No matter you are using a VideoByte DVD Creator or iTunes, both of them are very easy to handle. You can share the DVDs with your friends or play it on a DVD player or other computers as you like. Just enjoy it and have your funny family movie on weekend!

0 0 votes
Article Rating
Subscribe
Notify of
guest
0 Comments
Inline Feedbacks
View all comments