A Fast Way to Burn iPhone Video to DVD Disc

As iPhone doesn't support TF cards, so have you ever been annoyed that your iPhone doesn't have any surplus space for you to save your shot video on iPhone? Actually, it's not necessary to delete any videos you like, what you need to do is to convert iPhone videos to DVD. Considering that you may not know how to operate, therefore I will show you a fast and easy way to burn iPhone videos to DVD with the best iPhone videos to DVD converter: VideoByte DVD Creator which can create DVD disc, DVD folder or ISO file from various formats of videos like AVI, MOV, MP4, etc. To burn iPhone video to DVD disc, you need to click the download button below to download this software first.

Contents

Benefits of Burning iPhone Videos to DVD

Why burn iPhone videos to DVD? I will show you benefits of transferring videos from iPhone to DVD as below:

1.As mentioned before, converting videos to DVD can free up space on your iPhone.

2.You can play iPhone videos on any regular DVD player, so that you can enjoy watching iPhone videos on a big TV screen.

3.You may not find your videos if your iPhone is missing, so for better storage, you had better convert iPhone videos to DVD.

What You Need to Prepare

Before burning, except for your iPhone and PC, you need to prepare the following thing.

(1) A data transfer/ USB cable

(2) DVD burner hardware

(3) DVD creator software: VideoByte DVD Creator (Recommended)

(4) A compatible DVD disc

How to Burn iPhone Videos to DVD

Step 1. Transfer iPhone videos to PC

Use a data transfer/ USB cable to transfer iPhone videos to your PC.

Step 2. Register VideoByte DVD Creator

Install and launch the program, as you can see in the pop-up window, free trial users are not allowed to use this software to burn videos to DVD for more than 3 times in 30 days, get any free technical support or upgraded versions. In order to burn more videos to DVD, you are supposed to purchase and register VideoByte DVD Creator. Then how to register? Just enter the registration code and the email address, then you can start to use the full version.
DVD Creator Register

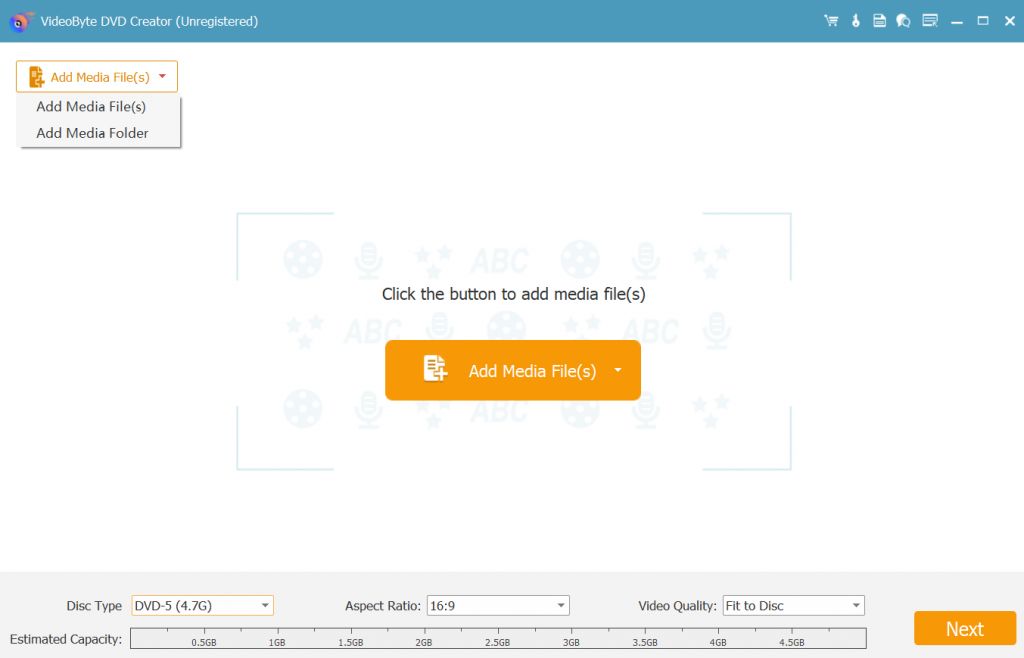
Step 3. Transfer iPhone Videos to the Program

To add iPhone videos to the program, you need to click one of the "Add Media File(s)" icons at the middle interface and upper-left corner.
Add Media Files

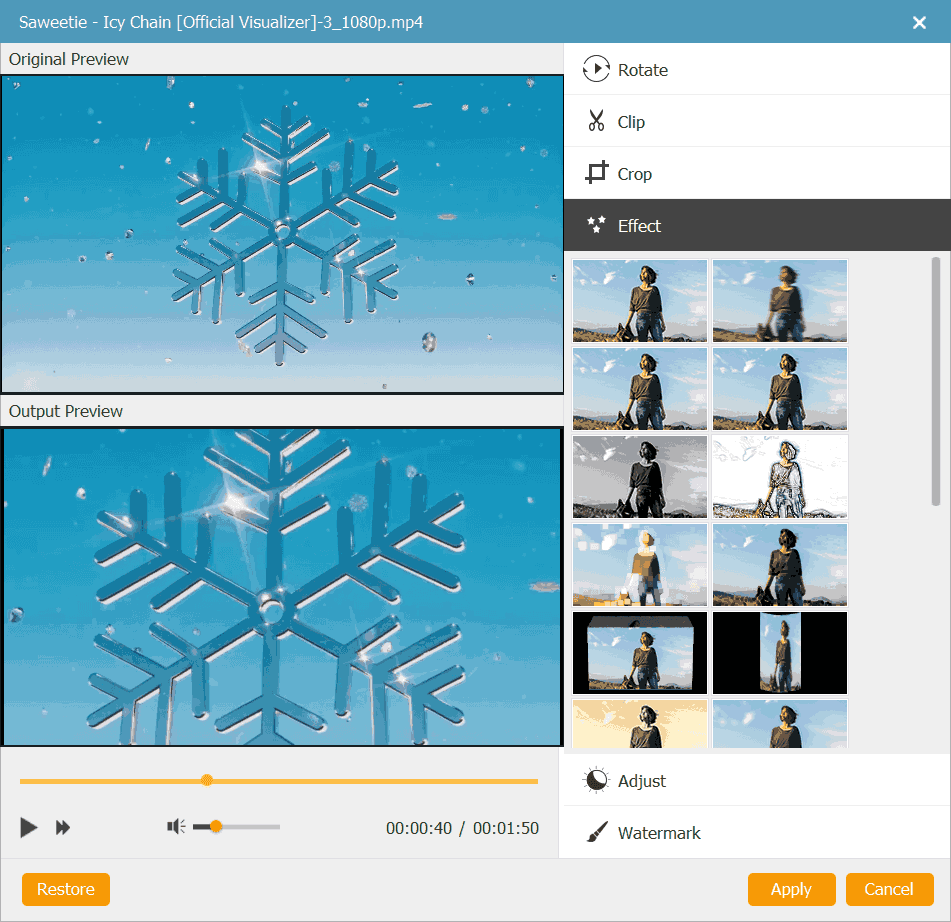
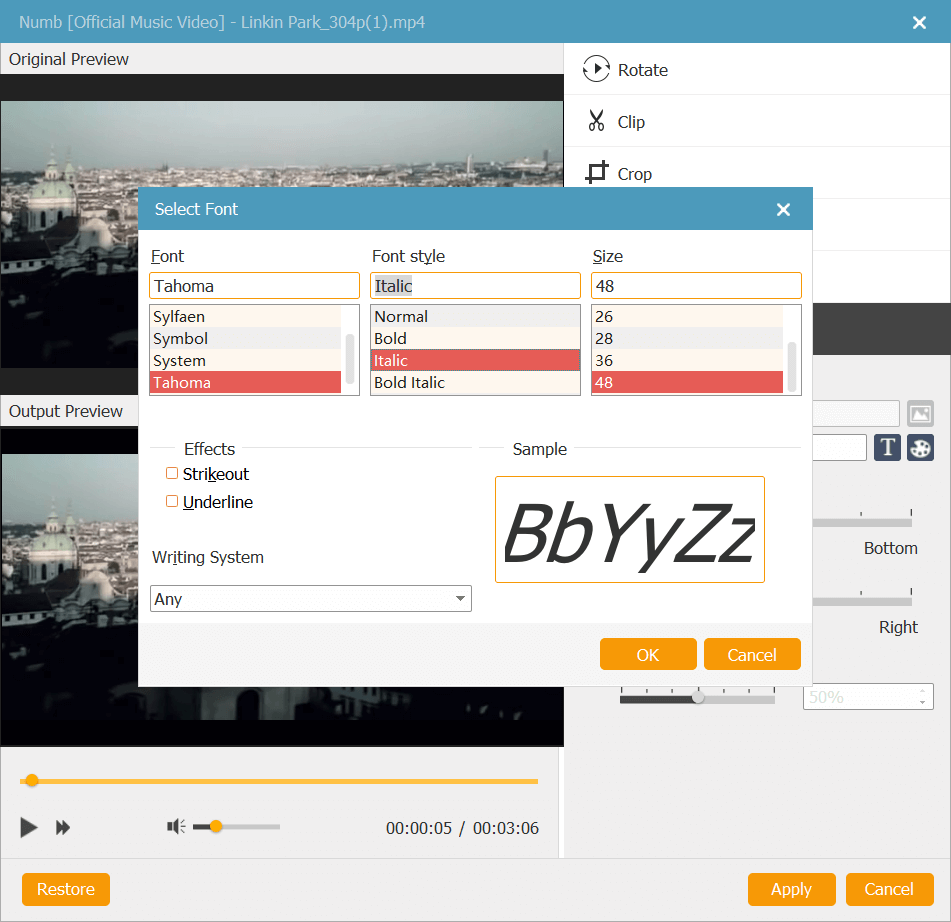
Step 4. Edit Videos (Optional)

If you want to edit your videos, you don't need to edit by iMovie. Just edit videos by clicking "Magic Stick" icon at the right side of each video. In the pop-up window, you find six options to edit videos including rotating, cropping, trimming, adjusting the brightness, adding filter and watermark. If you aren't satisfied with the edited video, you can click "Restore" icon on the bottom to reedit. After finishing editing, click "Apply" icon at the bottom.
Effect

Step 5. Customize DVD Menu (Optional)

After finish editing videos, click "Next" icon to enter the Menu Editing section. Adding a DVD menu is an optional choice, but I highly suggest you customize DVD menu for better visual effects. At the left side of the main interface, you will find a number of menu templates in various style including holiday, wedding, family, travel, etc. Select one of them as your DVD menu. But if you don't want to add DVD menu, then just click "no menu" at the lower-right corner. After all settled, click "Next" icon at the lower-right corner.
Add Text Watermark

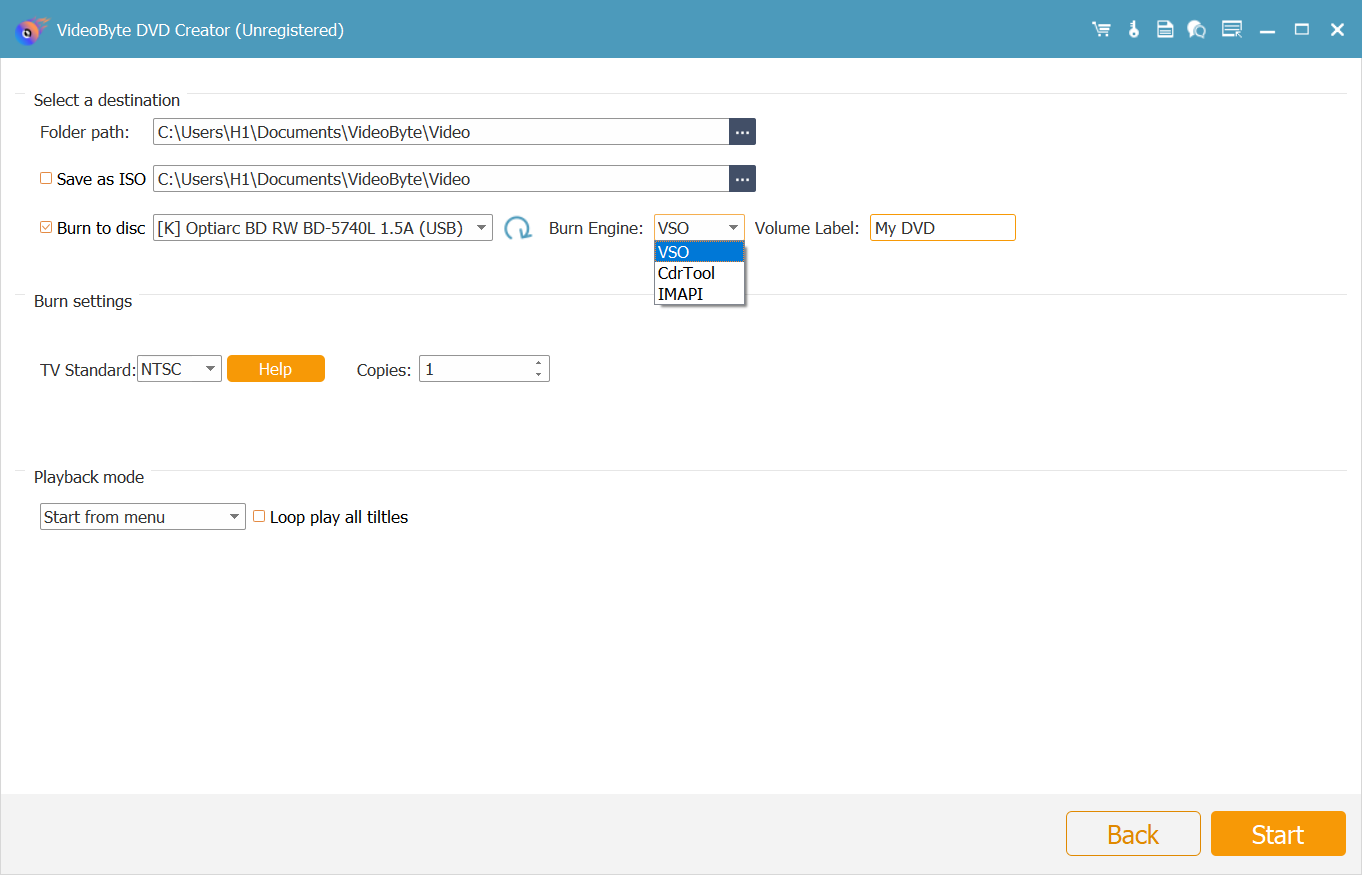
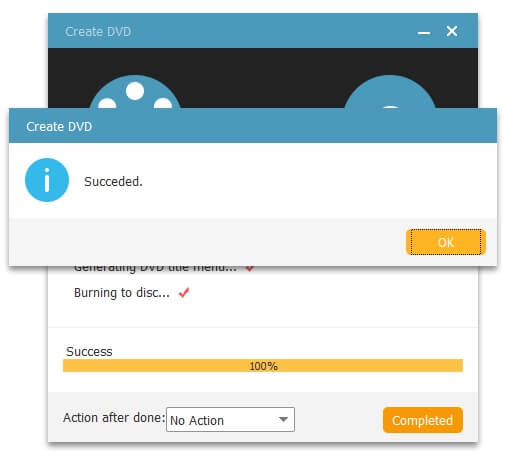
Step 6. Start to Burn Videos to DVD

Before you start to burn iPhone videos to DVD disc, you can select an output format, DVD type, and destination folder.
Burn to Disc
At last click "Start" icon in the lower-right corner to burn videos to DVD. When conversion is completed, click "OK" icon on the pop-up window. Then you can find converted videos on your DVD disc.
Burn MKV to DVD in VideoByte DVD Creator

Tips for Using VideoByte DVD Creator

Here are some tips that can help you have a better experience for using VideoByte DVD Creator.

Tip 1. You can set the background music, background picture and the opening film with your local music, picture and video file separately.

Tip 2. It allows you to adjust basic parameters of DVD disc such as Disc type, aspect ratio and video quality by selecting the parameters, add subtitles and audio tracks to your DVD disc manually.

Tip 3. Before burning videos to DVD, you can preview your DVD videos. If you are not satisfied with the created videos, then re-edit the videos.

Now you can start to burn iPhone videos DVD by following the above steps with VideoByte DVD Creator. Apart from transferring video from iPhone to DVD, VideoByte DVD Creator can also convert iPhone video to Blu-ray disc. But now, this function only available on Windows version.

0 0 votes
Article Rating
Subscribe
Notify of
guest
0 Comments
Inline Feedbacks
View all comments