4 Best Ways to Burn .WMV File to DVD on Windows & Mac
- Karen Nelson
- 26/06/2023

DVD Creator
"If I want to create self-made DVDs from some .WMV videos to play them on my smart TV, how to burn .WMV to DVD exactly? Any advice?"
Thanks to the advanced compression capability applied and great image as well as sound effects retained, WMV has been a popular option to encode videos today. However, when you wish to enjoy WMV videos playback on larger screens like smart TVs or desktops, it would be more rational to get them converted to DVDs without risks of getting the videos lossy. Therefore, how to burn .WMV to DVD becomes a problem many of you feel confused, especially when you haven't done it before.
In terms of this, the post today will concentrate on introducing 4 feasible ways to burn WAV file to DVD on Windows/Mac. It won't be a tough job when you get the right programs to help. Now, please read on and master how.
Burn .WMV to DVD with the Best WMV to DVD Converter (PC/Mac)
As mentioned yet, to burn .WMV to DVD, a priority is to find a reliable WMV to DVD converter delivering professional functions to help. When optimal options can be found online, here highly recommend VideoByte DVD Creator to you.
VideoByte DVD Creator is an all-rounded DVD burning program with great compatibility to support burning media files of a majority of popular formats to DVD, Blu-ray, and ISO files by easy manipulation. With an intuitive user main feed, you can clearly master the correct way to convert WMV to DVD or even burn WMV to ISO as well as Blu-ray when in needs. The program will retain lossless image and sound effects for you, with personalized settings to edit audio tracks as well as subtitles before burning.
Meanwhile, VideoByte DVD Creator is equipped with a handy built-in video editor, which can assist you to adjust videos and apply some effects to create vivid and unique DVDs from WMV files. The preset templates provided can facilitate easier menu editing and save much of your time and effort.
Overall, you can walk through the sparkling features of VideoByte DVD Creator before getting started with it:
- Great compatibility: the program not only supports almost all popular formats to burn, but also determines the output locations as DVD, Blu-ray discs of different types, and even ISO images for you.
- Customization on audios and subtitles: it enables you to import extra audio tracks as well as subtitles to merge with WMV videos, and even edit them before burning to DVDs.
- More video effects settings: with the helpful and handy built-in video editor, you can create perfect video effects in Preferences with very simple taps.
- Menu editing feature: the program also provides some preset templates to enable you to determine themes for the DVD discs you wish to create for making them unique.
How to Burn WMV to DVD with VideoByte DVD Creator
Please also walk through the manipulation guide below and master the correct way to burn .WMV to DVD with VideoByte DVD Creator.
Step 1. Get VideoByte DVD Creator Ready
First, please click on the Free Download button provided here to complete installing VideoByte DVD Creator. Unlike many other free WMV to DVD converters only supporting Windows systems, VideoByte DVD Creator is compatible with both Windows and macOS devices.
After opening the program, keep on using the free trial to experience its functions before determining to subscribe.
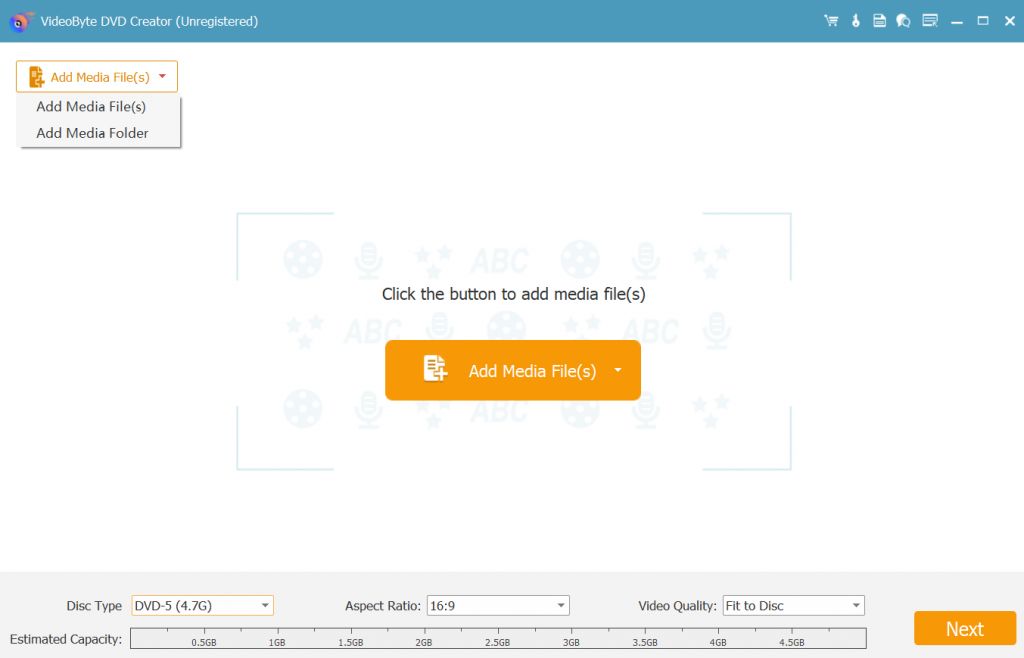
Step 2. Import WMV Files
On the main feed of the program, please click on the Add Media File(s) button in the middle of the main feed to browse and select the WMV videos you wish to burn onto a DVD disc. Directly dropping them here is possible.
Step 3. Edit WMV Videos
Once the WKV videos are imported to VideoByte DVD Creator, please click on the Edit button (the icon in the shape of a magic stick) and use the provided toolkit to adjust video effects in Preferences. It also allows you to adjust the video parameters such as the quality, aspect ratio here, too.
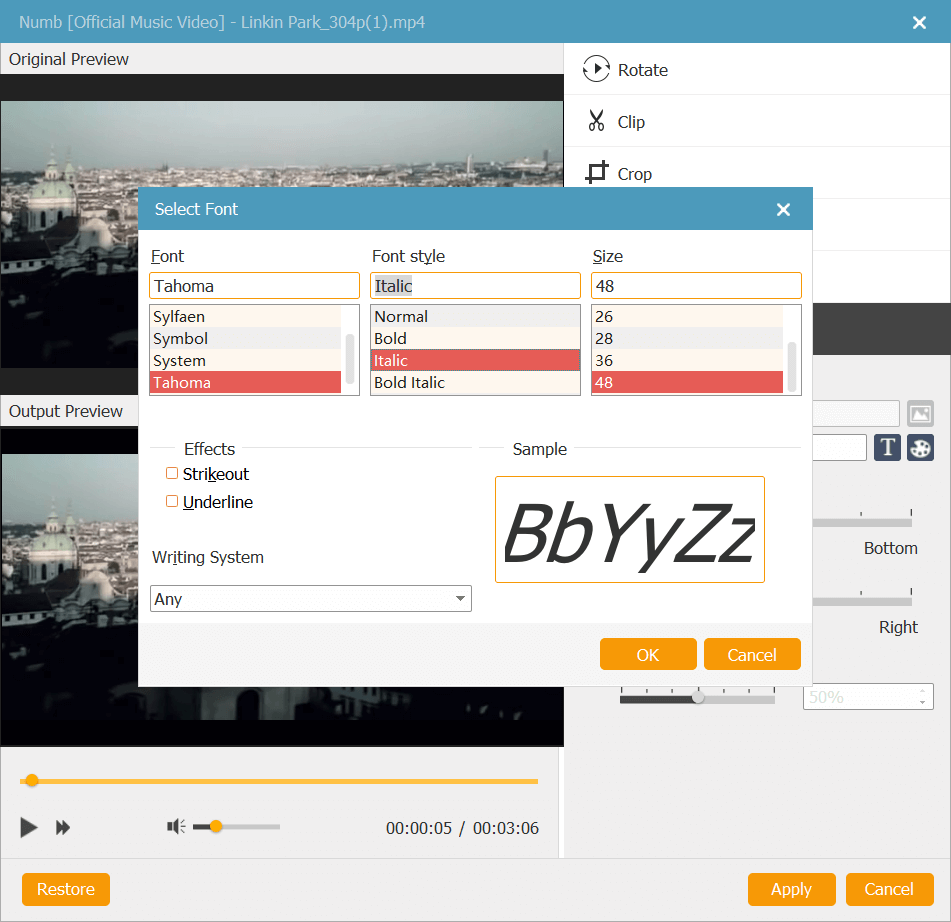
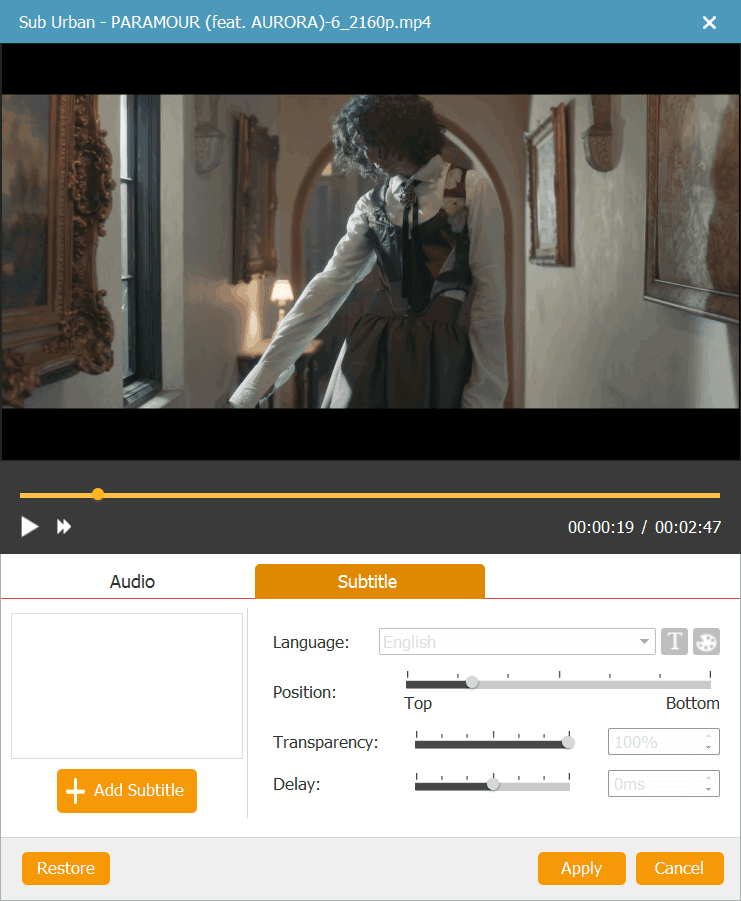
To go further, you can also import audio tracks as well as subtitles to embed with the WMV videos before burning them to DVD.
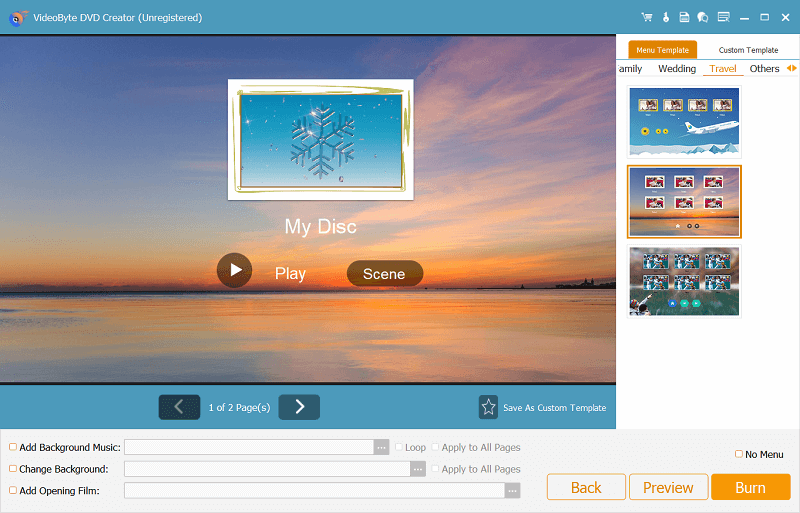
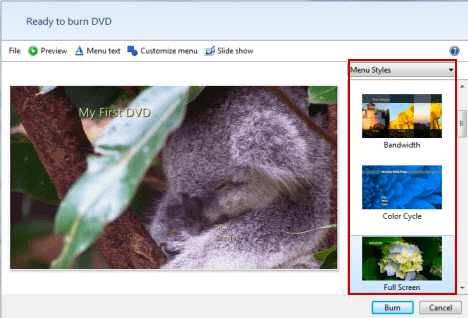
Step 4. Create Menu for DVD
Next, please continue to edit DVD menu. From the Menu Templates list provided on the right side of the screen, there are some preset themes you can directly select and apply. Please choose your favorite one based on the video contents to make it match.
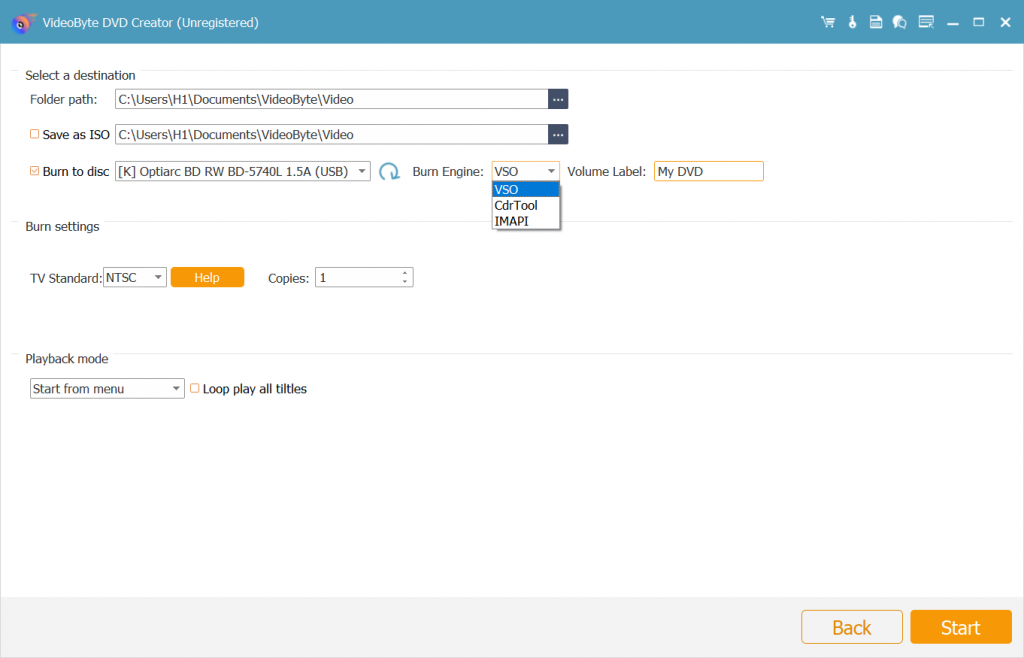
Step 5. Insert DVD and Burn .WMV to DVD
When all the above editing and settings complete, get ready to burn WMV file to DVD now. Please insert the DVD disc to your computer and continue selecting the burning settings. Eventually, simply by clicking on the Start button, VideoByte DVD Creator will process to burn .WMV to DVD for you in no time.
Burn WMV File to DVD on Windows (2 Options)
How to Convert WMV to DVD with Windows DVD Maker
Windows DVD Maker is a default program as a part of Windows Microsoft Suite, which will be pre-installed on Windows 7, Windows 8, and Windows 10. This all-in-one free DVD burning software can help you easily burn .WMV to DVD, also equipped some side features to use, like its video/DVD editing toolkit. Here, let's focus on the manipulation to burn WMV file to DVD first.
- Insert DVD disc to your computer first.
- Find and directly run Windows DVD Maker on Windows desktop. Please click on the large Add pictures and video to DVD bar to select WMV files for importing to the program.
- Continue the burning process by clicking on Next. Then you will be guided to the video editing procedure to adjust settings to personalize the WMV files before burning. When the settings are completed, tap Next to the following step.
- Subsequently, Windows DVD Maker will help you create as well as customize menus for the DVD disc. You can preview all changes made in this step to see the effects.
- Eventually, confirm clicking on Burn to burn .WMV to DVD in no time.
How to Convert WMV to DVD with Windows Media Player
- Please run Windows Media Player. You will need to insert a blank DVD disc and switch to the Burn module on the right panel of the main feed.
- Under the Burn tab, click the menu and then select Data CD or DVD to get ready for the WMV to DVD burning.
- Next, please import all WMV videos you wish to burn onto the DVD disc, and select them for adding to the Burn list.
- Finally, confirm Start Burn to burn .WMV to DVD immediately.

Burn WMV File to DVD on Mac Free with Burn App
Like Windows DVD Maker and Windows Media Player, there is also a professional and free DVD burner for Mac.WMV to DVD in a speedy way. Burn app is the one we are going to recommend. It offers smooth burning function to help you easily convert WMV to DVD. When it offers the speed setting, you can freely determine how long you wish to wait for the burning process. Now, please keep reading and master how to burn WMV to DVD with Burn on Mac.
Attention: As Burn will convert WMV to PNG first before burning to DVD, it will lower the video quality. To burn .WMV to DVD at original quality, please select the professional option, VideoByte DVD Creator to help.
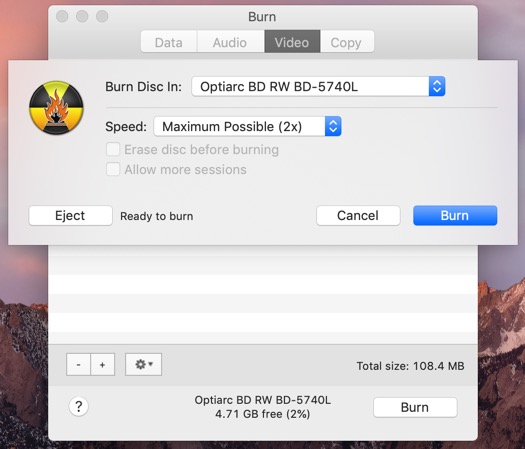
- When you get the Burn app ready, run it and also insert the DVD disc to your Mac with an external hard drive to let it detect.
- On the main feed of Burn, switch to the Video tab and click on + to import WMV files to the program.
- Continue to complete the burning settings such as selecting the speed before proceeding with the WMV to DVD conversion.
- Next, simply click on Burn to convert WMV to DVD on Mac in no time.
Extra Tip: What is .WMV Format?
Final Words
When you wish to play WMV videos on larger screens in DVD form, these 4 ways mentioned here all helpful to walk you through the correct procedures to burn .WMV to DVD. Although the default and free options can be attractive, they are less helpful as no editing functions provided, or the burning speed is slow, the output quality is compressed. Therefore, for better output quality, VideoByte DVD Creator is still your best option to burn WMV to DVD. Install it and get started for free now.
Hot Articles