How to Record a Webinar on Any Device (7 Ways in 2024)
- Karen Nelson
- February 24, 2023

Download Screen Recorder For FREE!
When most activities are moving online, people are more likely to host or attend a webinar through Internet instead of face to face. Therefore, the extended requirements to cater to such a change should be the rising demand on recording a webinar on devices. Imagine that when you are attending an important webinar for business or study purposes, for sure you won’t want to miss any detail mentioned on it.
Therefore, to help facilitate your working or studying efficiency, the post has tested 7 ways to record a webinar on any device and will introduce them to you. Now, take one or more of them as preparation before holding the need to record webinars in the near future.
How to Record a Webinar on Windows/Mac with VideoSolo
For sure, selecting a professional webinar recorder saves a lot of your effort. For such purpose, the best ranking solution to record a webinar on desktops is by utilizing VideoSolo Screen Recorder.
The program provides different recording modes, which allows you to record webinars with webcam, microphone, and system sound turned on at the same time. It is also possible for you to record audio-only webinars when you need. There will be noise cancellation and audio enhancement features provided, assisting you to retain uncompressed sound quality and keeping the webinar recordings can be clearly listened back later.
VideoSolo Screen Recorder is also a lightweight program so that it can ensure a no-lagging experience to capture an instant webinar. Meanwhile, there’s also a drawing panel enabling you to add annotations or notes when you need, which greatly improves efficiency while having webinars online. So this software is very suitable to record record various webinars like zoom meetings, teams meetings, google meet, and even more.
VideoSolo Features to Improve Webinar Recording Experience:
- Record the webinar with internal audio, your voice, and the webcam simultaneously.
- Deliver 1080p definition and record sound and voice clearly to ensure the best quality to save your recorded webinars.
- No watermarks will be added to the webinars while processing the recording.
- No delay occurs in capturing an online webinar.
- Instant painting tools are provided to add annotations or notes to recorded webinars.
- Locked window recording mode is provided to capture only the webinar window and exclude all activities on other programs.
Now, get this recorder and spend a moment learning about how to record a webinar with VideoSolo Screen Recorder just by simple manipulation.
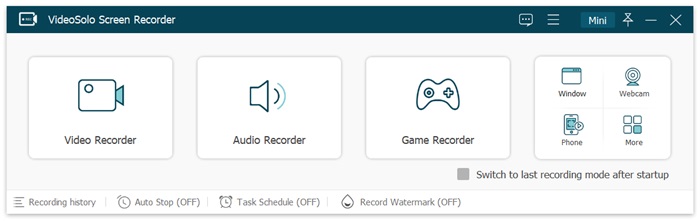
Step 1. Select Screen Recording Mode
Click Video Recorder and start your recording preparation. Video Recorder is here able to capture a live webinar with full audio and webcam video.
Note:
If you want to lock the recording window to record only the webinar, you can choose Window Recorder instead. You will then be asked to select the specific program you want to record, and all activity on other programs will be excluded.
Step 2. Adjust Recording Settings to Record Webinar
Adjust your recording area and make it suitable for the webinar interface. Meanwhile, you can turn on webcam, microphone sound, and system sound in preferences based on your webinar recording needs.
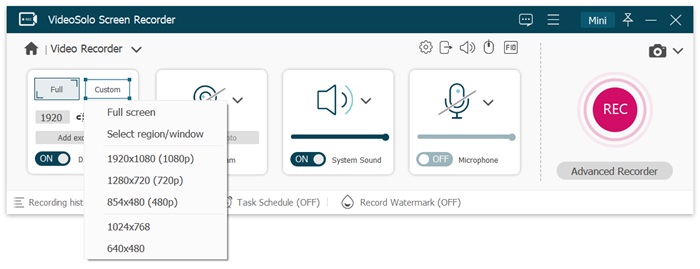
Step 3. Configure Recording Settings
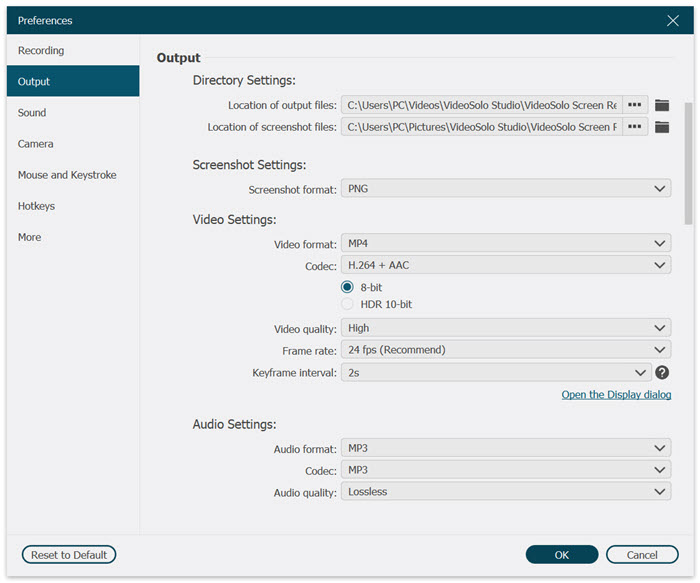
Now, before proceeding with the webinar recording, you can determine the output settings by turning to Preferences > Output and adjusting the Video format, Video codec, Video quality, and Frame rate to ensure original quality and also no-lag performance while recording a webinar.
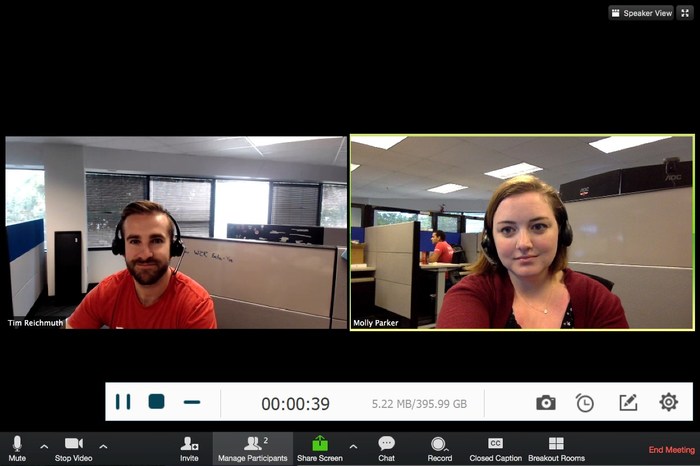
Step 4. Click the "REC" Button and Start Recording
Now you can click the “REC” button in red to record the webinar. During the recording, the system sound and microphone sound can be adjusted at any time. It would be very convenient for you to turn off one of them or record both simultaneously.
Step 5. Click "Stop" and Make Needed Editing
After the live webinar comes to an end, you could just click the “Stop” button and edit the video as you need. Here you can just crop the unnecessary parts and click “Save” to save it on your disk.
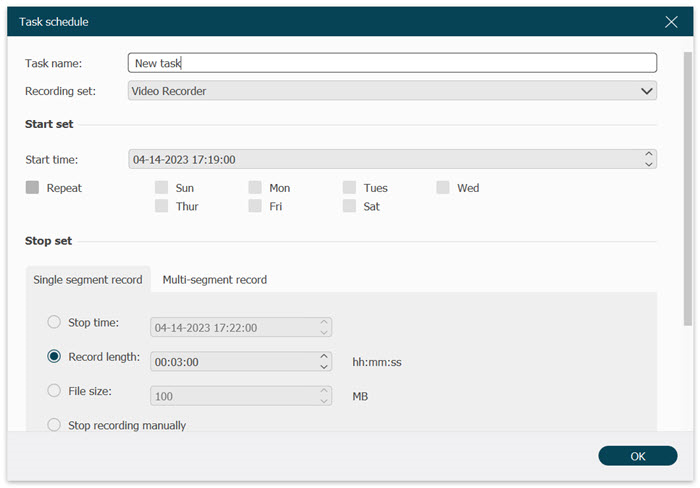
A Bonus Tip - Excellent “Task Schedule” Function!
We all know that plans change all the time. What if you could not catch the webinar on time? The good news is that we get a plan B here for you, which is called “Task Schedule”. You could set the exact time and date you would like to start recording webinars. The end time of recording can be set to whenever you want or you can end it manually.
How to Record a Webinar on Mac with QuickTime Player
Have you ever heard of QuickTime Player? Yes, it’s a free and user-friendly screen recording app embedded in your Mac computer, which can be used to record webinars without any charge but in decent quality.
For Mac users, QuickTime can be a priority when you need to record a webinar because you don’t need to download any other software for screen recording. It also supports capturing the screen and make easy editing. Follow these simple steps and have your live webinar recording right now!
Step 1. Launch QuickTime Player
Click the QuickTime Player icon to launch it (or use the shortcut hotkey Shift-CMD-5).
Step 2. Select New Screen Recording
Click “File” and select “New Screen Recording” to enter webinar recording mode.

Step 3. Adjust the Recording Region
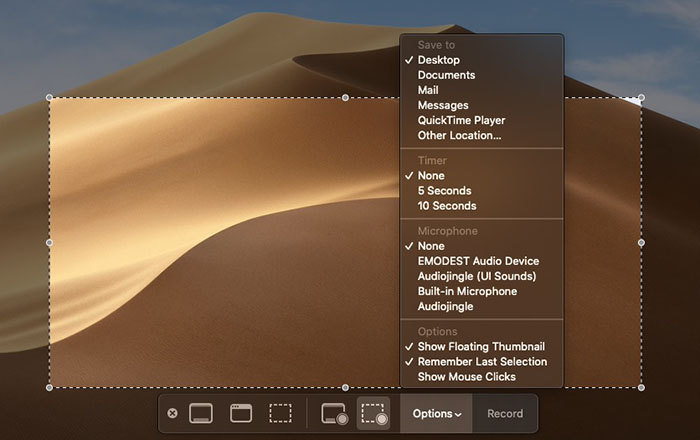
Customize the region of the recording to make sure it’s suitable for webinar window. Before click “Record” and start your online webinar recording, click “Options”.
In Options, you could find more personalized options like “Timer” to countdown to record, “Save to” to choose the location you would like to save the recordings, “Microphone” to decide whether you would like to record external microphone or not, etc.
Step 4. Click "Record" Button When All Settings are Done
Click “Record” button when you finish all settings. And click stop button when the webinar is over.
After you click the stop button, the video you just recorded will show up on the screen. Then you could save it on your Mac or have it easily trimmed.
How to Record a Webinar Using Browser Extension
If you prefer not to download a desktop program only to record a webinar, you can find many useful browser extensions including a screen recorder when using Chrome. Here, we recommend Fluvid. It is an online screen capture and video recording software which is also free to add to Chrome.
Once installed on Chrome, the extension is able to record your webinar with or without webcam. And there are in-built editing tools to customize your recorded webinar videos before exporting. Now, follow the manipulation guide below and check the way to record a webinar utilizing such a browser extension instead of a desktop program:
Step 1. Search for Fluvid in your Google Chrome store and then click Add to Chrome on the interface.
Step 2. It is required to authorize an account to enable the recording permission, then click Next.
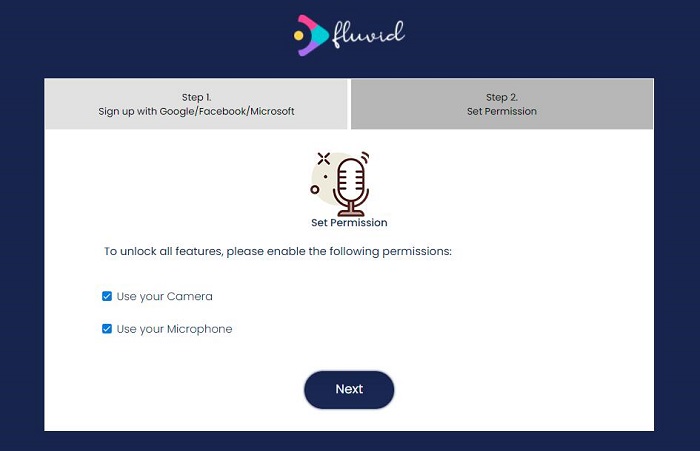
Step 3. You can launch the extension in your browser now. Here you can choose whether to record screen with a webcam and turn the microphone on. It is also suggested to choose the Current Tab mode when it comes to record a webinar.
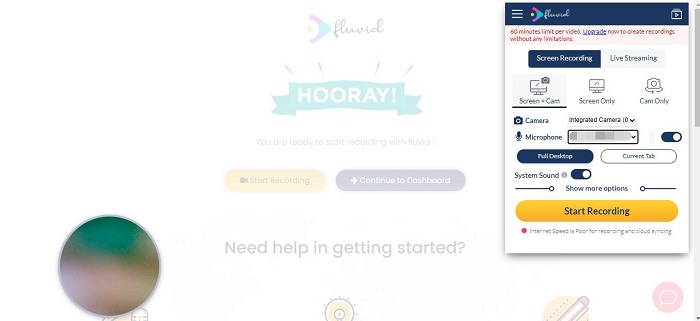
Step 4. After the all is set up, open your webinar and click the Start Recording button to start recording. When it is over, the video will be saved in My Video tab.
How to Record a Webinar with Online Recording Tool for Free
Utilizing an online tool is also a rational option to record a webinar for free even without installing third-party screen recorders. When the leading brand,, Apowersoft also equips the free online screen recorder with its launched desktop version, you can directly utilize it to capture the online webinars in one-shot with easy manipulation.
You don’t require to install an extension for running the online screen recording tool provided by Apowersoft, however, you will be guided to add a launcher when the first time you utilize it.
Now, please follow the procedures below and learn the way to record webinars online with Apowersoft Free Online Screen Recorder:
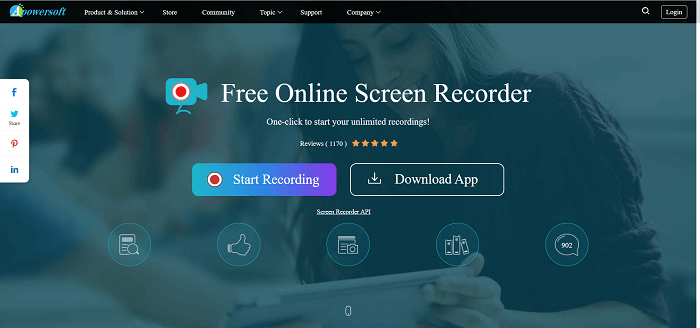
Step 1. Open Apowersoft Online Screen Recorder in your browser. Download launcher and install it before start recording.
Step 2. Start your webinar and click Start Recording to activate the online recorder. You can customize the recording mode and region. And if you prefer, you can also use it to record web camera.
Step 3. After recording, the video will be saved to local disk, you can also upload it the RecCloud and YouTube.
How to Record a Zoom Webinar
Recording a Webinar on Zoom can be very convenient if you can a host, Zoom calls this feature Local Recording, and it’s available for paid and free users. For safekeeping, you can upload those recorded webinar videos to cloud services such as Google Drive or Dropbox. You also have the option of adding those recordings to streaming services such as Vimeo or YouTube. Participants can also record the webinars, but you’ll need to give them permission to do that.
In the following, you will also master the manipulation to record a webinar in Zoom with its built-in recording feature:
Step 1. Sign in to the Zoom web portal.
Step 2. Click the Settings tab and then navigate to the Recording tab. Now verify the Local Recording option is enabled. If you are the host, you may also toggle to enable the Hosts can give meeting participants permission to record locally.
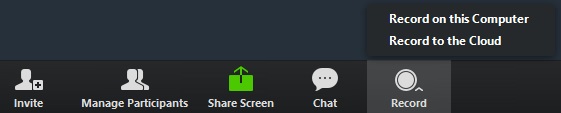
Step 3. If the host has granted you permission to record the ongoing meeting, click the Record icon to start recording the Webinar. If there is a menu, just select Record on this Computer.
Step 4. Click the Stop or Pause icon to control your recording process. After the meeting is ended, Zoom will automatically convert the meeting recording to files you can access.
How to Record a Webinar on Android
Want to record webinars on your Android instead of utilizing a computer? DU Recorder is a quick fix for you. It supports screen recording, video call, live streaming, etc. With the easy-using function, you can activate it at any time when you are going to have a webinar online with your Android devices.
To record a webinar for free on your android, follow these steps:
Step 1. Launch DU Recorder and Get Ready
Download and launch DU Recorder to check if it’s ready to go.

Step 2. Open Control Center to Start Recording
Click the red triangle to start recording. Then you could turn to the webinar interface and DU Recorder is going to recording what’s actually going on of your Android. Before that, make sure you’ve closed any notification not relevant to the webinar in case.
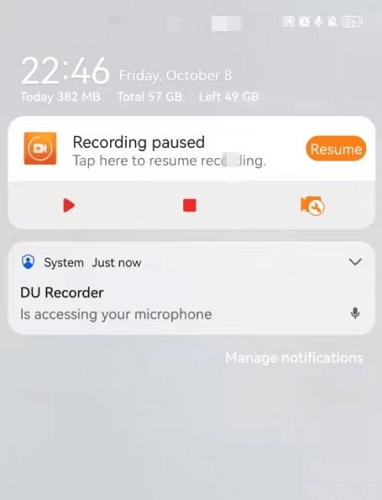
Step 3. Finish the Recording and Make Needed Editing
After the webinar ends, you could open the control center again, click the red square and stop recording. And the video you just recorded will immediately appear on the main interface of DU Recorder.
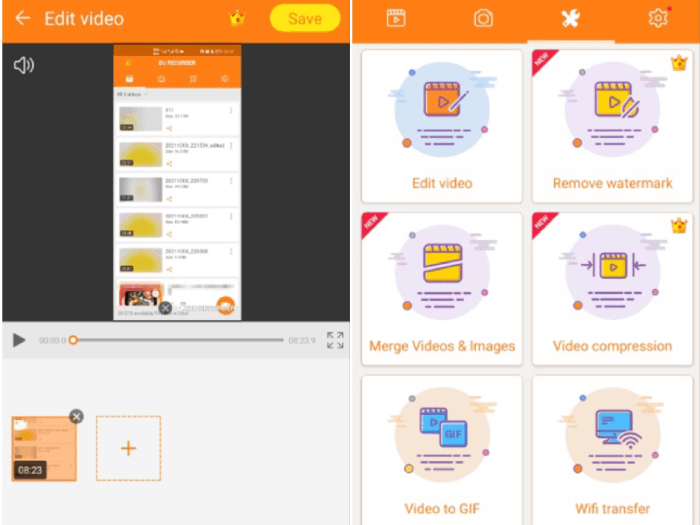
Here you could start editing works instead of saving the video and then editing it. You could trim some unnecessary parts when there is an adjournment on the video, add some background music for future posts, or type some subtitles for you to remember what’s the next topic of the webinar.
Finally, save the video for any other purpose.
Step 4. Other Tools Built-in
Enter the tool box, you could see many helpful functions. If you want to add some significant images into the webinar video, you could select “Merge Video & Images”. Once you find some interesting moment of the video, you could use “Video to GIF” to create fancy GIFs and share them with your friends! For more practical features, just download DU Recorder and have a try!
How to Record a Webinar on iPhone/iPad with Built-in Recording Tool
If you’re familiar with iPhone and iPad, you might know that the screen recording tool is built in their iOS system. It is the simplest way to effectively screen record a webinar even without third-party recording applications installed, but it does not offer any editing tool or webcam mode for recording. In the following part, I will introduce how to make webinar recordings in iPhone for example.
If you wish a more professional way to record webinars, trying VideoSolo Screen Recorder to capture them then transfer to iOS devices is also a good idea.
Step 1. Add Screen Recording Tool to Control Center
First of all, go to Settings and find Control Center, tap the “Add” icon beside the “Screen Recording” tool. Then you could see this tool show up in your Control Center.
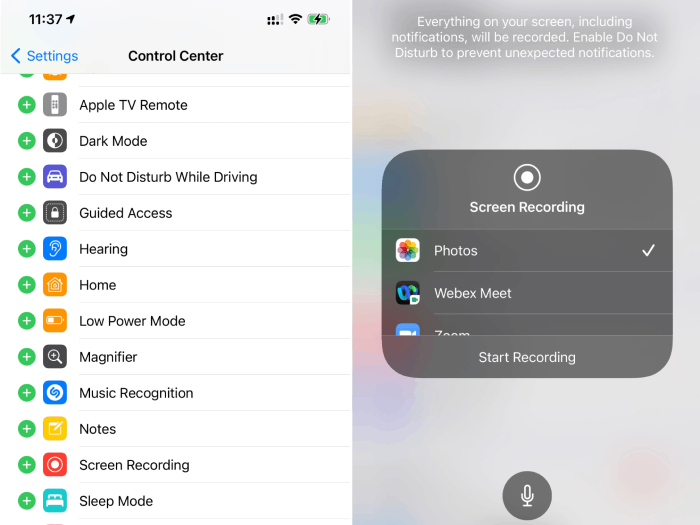
Step 2. Start Recording with Microphone on/off
Before you start recording, you can choose whether to turn on or off the microphone to tap the microphone icon. Then, the recording preparation is done! Tap “Start Recording” and wait for the 3-second countdown.
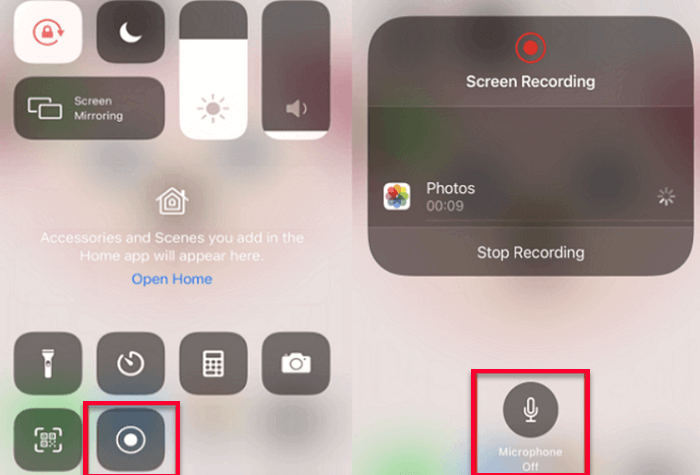
Step 3. Finish the Recording and Edit it
Tap “Stop” when you finish your recording. If you didn’t change the save location before, you would find the video you just recorded in your photos. That would also be very convenient for you to record any important content at any time.
Overview of the 7 Webinar Recording Tool (Table Comparison)
| Products | Video Editing Tool | Record Webcam | Quality | Customize Recording Area | No Lag | Supported OS |
| VideoSolo Screen Recorder | √ | √ | Lossless | √ | √ (up to 60fps) | Windows, Mac |
| Zoom Recorder | × | × | High | × | √ | Windows, Mac |
| Fluvid Browser Extension | √ | √ | Middle | √ | √ | Windows, Mac |
| QuickTime Player | × | √ | High | √ | √ | Mac |
| Apowersoft Online Recorder | √ | √ | High | √ | × | Windows,Mac |
| DU Recorder | × | √ | Middle | × | × | Android |
| iPhone Built-in Recorder | × | × | Middle | × | √ | iPhone |
Tips for Recording an Interactive Webinar
The importance of webinars cannot be overstated. Above we’ve learned about several great tools for recording webinars, so how do we make an interactive webinar recording even better? In an interactive webinar, we could be a host or the attendees. To be a qualified host or attendee can be of great assistance to a successful webinar. Here are some tips on how to record a webinar better from both the host’s and attendee’s perspective.
Before the Webinar
- About the Topic
Host: Email the agenda of the webinar to all your attendees (If it’s a public webinar with a large number of attendees, just make sure to post the meeting information in advance), including the time and date, the topic of the webinar, in case your attendees miss the webinar.
Attendees: Make sure you know about the agenda, time and date, topic of the webinar. If possible, prepare some key questions you would like to ask or share during the webinar. That would make you more concentrate on the webinar.
- About the Recording Devices and Software
Host: As the most important medium of communication between the host and the attendees in this webinar, it is necessary to ensure that all the equipment is running smoothly, and the hardware such as microphone and camera are available before the webinar starts. Find a reliable and stable webinar recording software and check if it could record the sound and images perfectly.
Attendees: The same as host here, you might have to ensure that the equipment is running smoothly, and the hardware such as microphone and camera are available before the webinar starts. Find a reliable and stable webinar recording software and check if it could record the sound and images perfectly.
- About the Content of a Webinar
Host: Practice makes perfect. If you’re totally a green hand for host’s job, you could ask for advice from a senior. They would share a great amount of suggestion with you. Be noted that a host should be the one that is most familiar with the content of the webinar. Prepare some delicate soft music (or other genre that meets the topic of webinar most) during the adjournment.
Attendees: Choose the content that you’re interested with most, and prepare some questions you would like to ask. If you are one of the speakers, figure out when you need to speak.
During the Webinar
Host: Make use of webinar software to eliminate/mute unnecessary speech/sound. Study the control panel and do some necessary practices. Encourage attendee to speak and increase interaction with them because distractions are unavoidable during several hours of webinar. If it’s a webinar between several people, encourage them to turn on the camera and have eye contact with them which may convey a warm atmosphere.
Attendees: You might need to know about some hotkeys of the webinar software like “mute”, “turn on the microphone”, etc. to keep up with the host. Ask questions at the right time. Try to recall every time when you attend a meeting.
After the Webinar
Host: To make your webinar recordings more worth sharing, you could cut out some unnecessary parts like a long silence, remove video noise or consider to add some subtitles, music, annotations, etc. Finally, email it to your attendees or post it to YouTube, Facebook or other channels (if necessary).
Attendees: If you would like to save it just for future viewing, you could download it and save it on your personal device. However, if you want to share it with your friends or followers, try get some interesting editing works! Snapshot some brilliant sayings and even turn them into GIFs.
Get Ready for Your Next Webinar
Today, the importance of webinars cannot be over emphasized. The diversified webinars have greatly enriched our work, study and life and we are increasingly inseparable from it. Therefore, recording them for future study or other purposes might pay you back in the near future.
Choosing a proper and fully functional screen recording software would help you record valuable contents at any time. VideoSolo Screen Recorder not only supports recording any on-screen activity without lag or watermark, it also makes it possible to draw, annotate, or take a snapshot on the recording area in real-time. For more well-designed features, download and try out to save your webinar recordings!