2 Simple Ways to Record PS4 Gameplay Without Capture Card [Definitive Guide]
- Karen Nelson
- March 19, 2022

Download Screen Recorder For FREE!
The relaxing and exciting gaming time on PS4 (PlayStation 4) is usually the happiest hours after all day work and during holidays. Enjoying gaming by yourself is great, but saving the highlight moments or sharing the game clips or tutorials with others can add on even more fun to it.
Sometimes you may want to record the PS4 gameplay. That doesn’t matter if you are a newbie at it. In this article we will provide you with 2 easy methods to record PS4 gameplay using the PS4 built-in tool or the PC, no need for a capture card for both.

How to Screen Record on PS4 with the Built-in Tool (Up to 60 Mins)
The most convenient way to record gameplay on PS4 is to use the built-in feature without extra tools. Luckily, there is, and the way to capture video clips on PS4 consoles is simple. You can press the SHARE button twice to start recording, and then press the SHARE button twice to stop recording and save a video clip of your gameplay. Video of the most recent 15 minutes of gameplay is continuously and automatically recorded.
Although the setting process is not complex at all, we still provide you with a detailed step-by-step guide to teach you how to do this. Follow this guide to set it up and then make PS4 game videos by yourself.
Note:
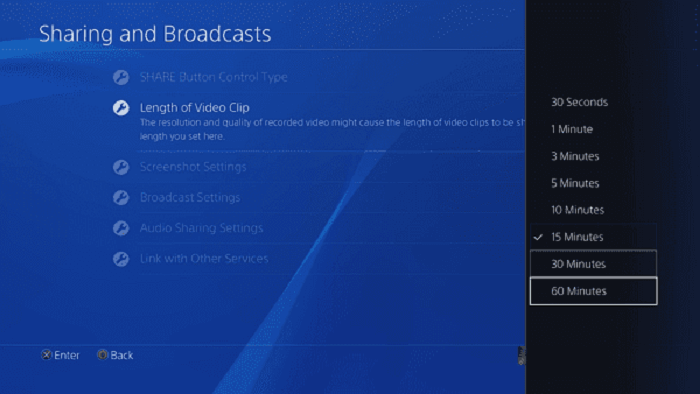
Step 1. Set up Recording Length of the Game
Launch the game, and then hit the “Share” button at the DualShock 4. Find out “Sharing and Broadcast Settings” at the left side menu, and head to “Length of Video Clips” to customize the recording time. As you can see, the time length ranges from 30 seconds to 60 minutes. Select the one as you prefer.
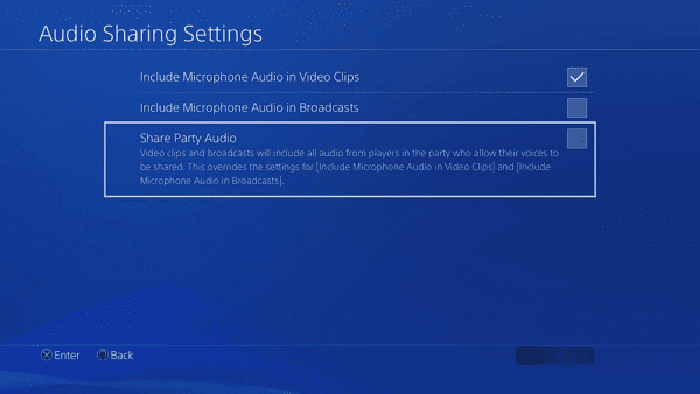
Step 2. Customize Audio Settings
You may want to record the PS4 gameplay with voiceover. Go back to “Sharing and Broadcast Settings > Audio Sharing Settings”. Tick “Include Microphone Audio in Video Clips” if you want the microphone to be recorded. By the way, also tick “Share Party Audio” if you need.
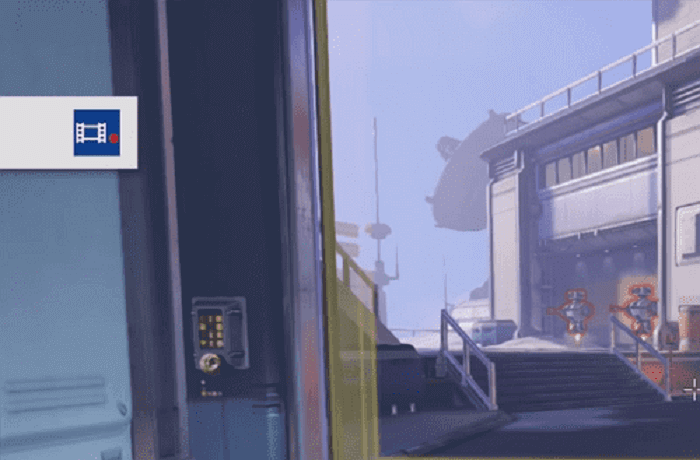
Step 3. Start Game Recording on PS4
Now, basically the settings are done. Go back to your game, double tap the “Share” button to start recording the gameplay, and you will see the capture icon at the top left of the interface.
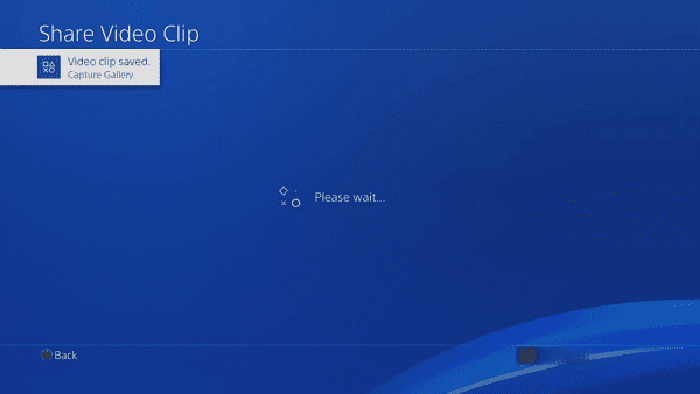
Step 4. End the Recording
The game recording will be ended when it reaches the time limit according to your settings. Or, if you want to end the recording at a certain time, double click the “Share” button as what you do to start recording the screen. The capture icon will also show up, telling you that the video is saved to the Capture Gallery.
Note:
If you don’t want to manually record the PS4 gameplay. You can also use “Share > Save Video Clip” to save the PAST game videos automatically. Similarly, the time length is based on what you have set.
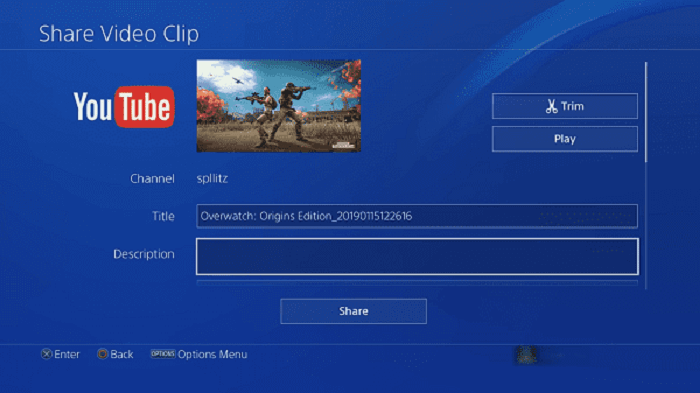
Step 5. Edit the Gameplay Video and Upload it to YouTube
This is an optional step. As the notice say, hit the PlayStation button at DualShock 4 and go back to home screen > Library > Applications > Capture Gallery to view your recorded game clips. If it’s hard to find out, try to sort by time or something else to quickly identify it.
Select the video and press the “Options” button on DualShock 4. You can trim the video, change the information, and then upload it to a platform like YouTube.
How to Record PS4 Gameplay on PC (with Webcam)
Although Recording videos on PS4 is simple, it doesn’t support the webcam and there are limited editing features and time length. An alternative way to break the restrictions is to record it on PC with a recording tool.
There is a number of third-party recording software for PS4 gameplay recording. Here we recommend VideoSolo Screen Recorder because it is versatile enough to fulfill most of the recording needs. In the first place, it can record the webcam. It also has selectable video formats, video qualities, and frame rates to get good quality gameplay video. To improve the convenience, you are allowed to use hotkeys to control the whole recording process without showing the floating panel. In short, it’s an expert at desktop recording.
VideoSolo Screen Recorder
High-performance and multifunctional screen recorder that records video & audio activities on your computer in high quality.
- Capture any areas of your computer screen in HD quality.
- Record all types of audios to MP3/AAC/M4A/WMA.
- Marvelous editing features to help you record better.
- Advanced recording features to fit your using habits.
Windows 11/10/8/7/Vista/XP/Mac OS X 10.7 or above
The follow-up is a complete guide on how to record PS4 gameplay with the VideoSolo tool. With no need of a capture card, you can also record high-quality gameplay. Considering that you may want to share the videos on YouTube, we will also illustrate it in this part.
Note:
Recording PS4 Gameplay on PC requires remote playing the PS4 screen on the computer. If you have no idea about it, check PS4 Remote Play Tutorial Documentation. The first-time settings may cost some time, but things will get easier for next time.
Step 1. Download and Install the PS4 Recording Program
Step 2. Make the Recording Settings
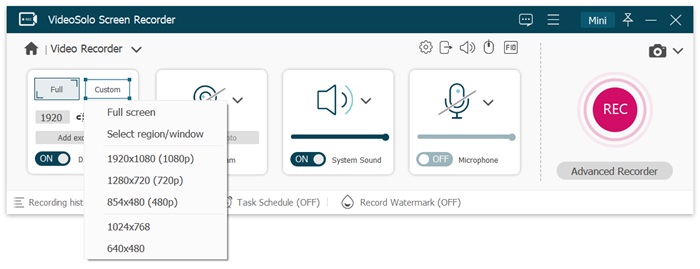
When the PS4 game is ready to play on PC, run VideoSolo Screen Recorder, click on “Video Recorder” on the main interface. Then you will enter this setting window. Usually, choose full screen, but if you want to select the recording area, you can customize it by yourself.
For uploading the game video to YouTube, you’d better follow the recommended resolution and aspect ratio listed below.
Note:
Here’s the recommended resolution and aspect ratio of YouTube player:
2160p:3840×2160
1440p:2560×1440
1080p:1920×1080
720p:1280×720
480p:854×480
360p:640×360
240p:426×240
After the recording screen is set, turn on and adjust the Webcam as you need. Also, remember to adjust the volume. “System Sound” definitely must be turned on to record the sound of PS4 gameplay. If you want to record your own voice while playing the game, toggling the “Microphone” on.
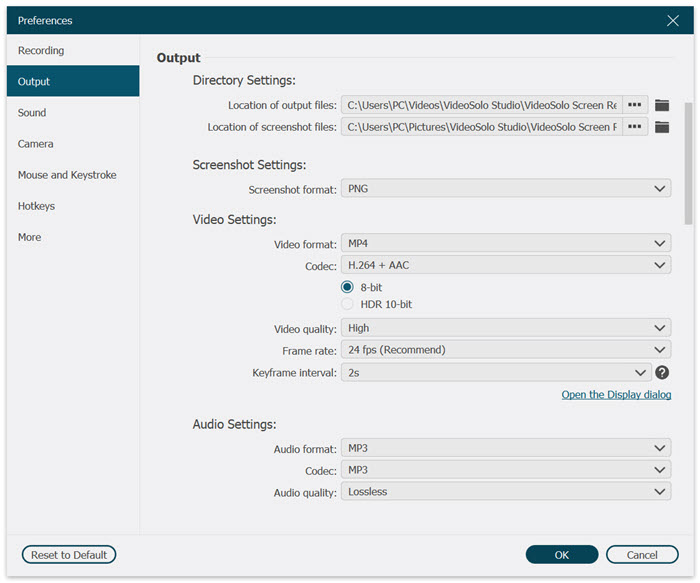
Step 3. Click "More settings" to Modify Output
Click “More settings” above “Microphone” (or you can directly enter “Preferences” instead) to set the output video format and frame rate. YouTube supports upload video in WMV, MP4, MOV and AVI format, so you can choose as you like. You can also increase the frame rate to make your PS4 gameplay recording look smoother.
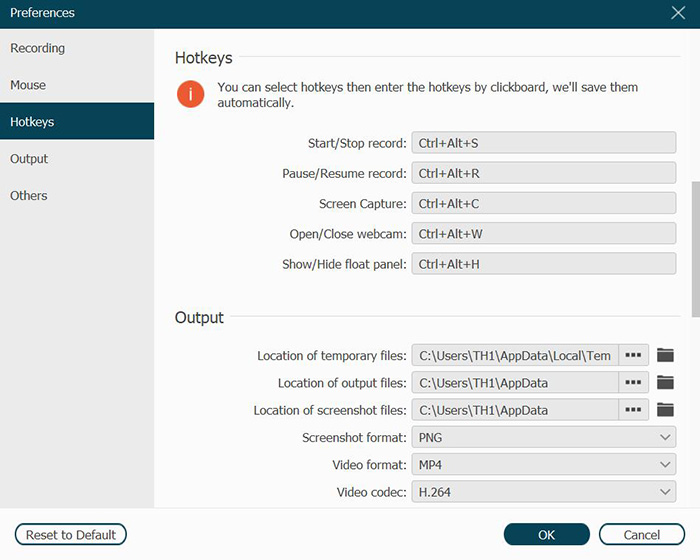
Step 4. Set up Hotkeys for Quick Controlling
While the PS4 gameplay is in the process, you probably don’t want to see the floating control panel. So, you can set hotkeys to pause, stop, make a snapshot or hide float panel as long as not conflict with other gameplay hotkeys, if you are not using DualShock 4 controller.
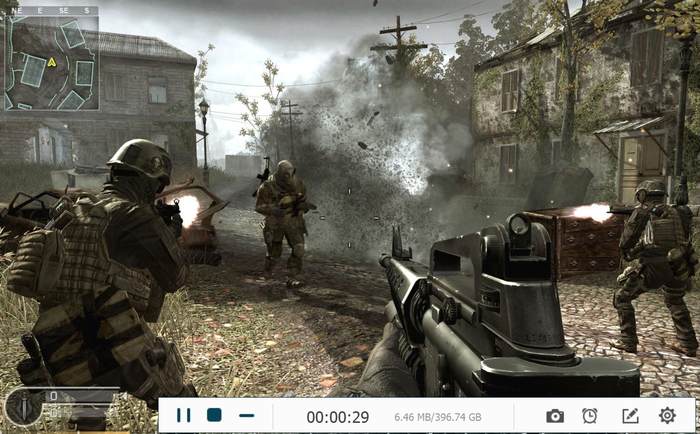
Step 5. Click "REC" button to Start Recording
Click the red “REC” button to start recording. The hotkeys come in handy when you are going to hide float panel and control the recording process.
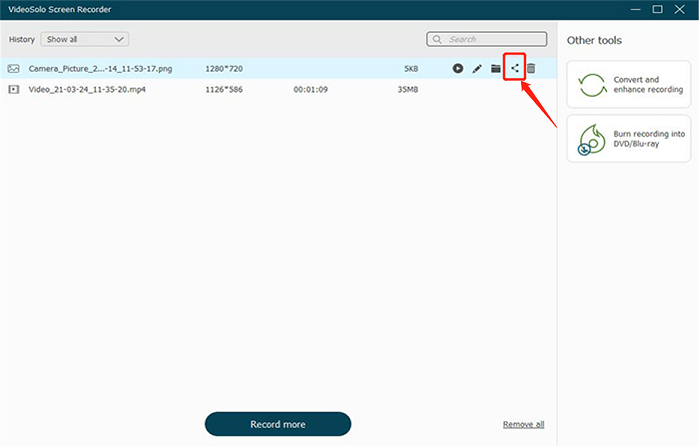
Stop the recording process and you can preview and clip the PS4 gameplay video before save. Now you may see all the files you have recorded in the left panel. You are able to share your PS4 gameplay video all over the world through YouTube by uploading through YouTube upload
Bonus Tip: How to Edit and Share PS4 Recorded Gameplay
PS4’s built-in screen recording tool also comes with basic video editing functions. Here, we will use trimming video as an example to show you how to use PS4 console for simple video editing.
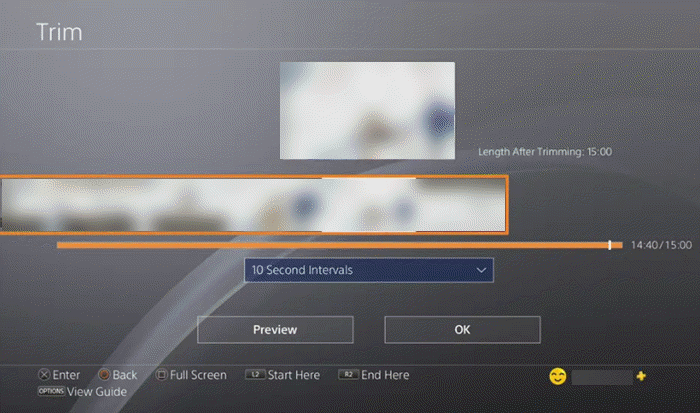
Step 1. From the PS4 Home Screen, select “Capture Gallery“, and in which select the clip that you want to edit. Press “Options” and select “Trim“.
Step 2. Using the D-Pad on your controller to navigate through the timeline to decide when you want the video clip to start. And then press “L2” or press “X” and select “Start Here“.
Step 3. Navigate to where you want the video clip to end and press “R2” or press “X” and select “End Here“. Press “OK” and select whether you want to save the trimmed version as a new clip or overwrite the existing one.
Step 4.After finish trimming the video, select the clip in the Capture Gallery and press the “Share” button on your controller, and select if you want to upload it to Twitter or YouTube.
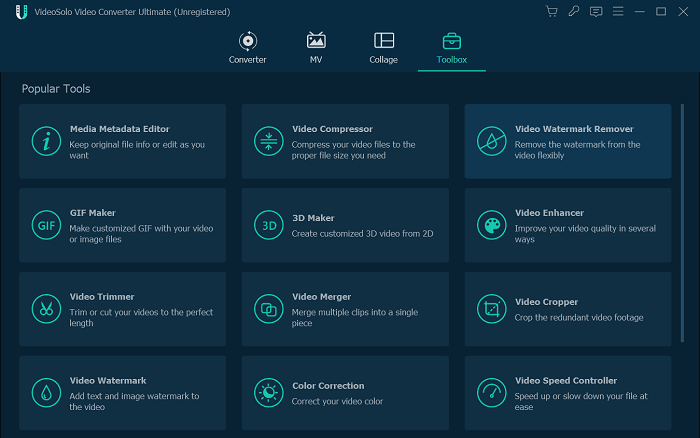
If you want to do more editing with your video clip, here we recommend you a multi-functional video edit tool VideoSolo Video Converter Ultimate, which is able to help you add watermark to your PS4 video, reduce noise of your gameplay video, compress your video file etc. in just a few clicks.
Just click the button above to free download the software to your computer. Install and open the software, go to the “Toolbox” tab, and you’ll see all the useful functions for video editing as shown below.
Conclusion
Here we have showed you two easy ways to record PS4 gameplay. The first method is to use the built-in tool. It’s simple and quick, and can satisfy your basic recording needs. Inevitably, there are limitations such as no webcam, the time length, restricted editing, etc.
If you want to record the gameplay more flexibly, try VideoSolo Screen Recorder to record it on your PC. It makes the recording more adjustable, and your webcam activities can be greatly recorded.
Hope this article is helpful to you. And enjoy yourself in the PS4 game world.