How to Record Lync Meeting in High Quality
- Karen Nelson
- March 28, 2022

Download Screen Recorder For FREE!
Although Microsoft tends to replace Lync with Skype for Business since 2015, there are still users using Lync for holding meetings. I am one of them. One of the advantages of online meetings is that you can record it and save to a file for play back. Lync 2013 also has its recorder. But I felt annoyed in recording Lync meeting because its built-in recorder is not so powerful that makes me feel hard and inefficient to my work.
For example:
• “The low resolution of 800×600 makes the un-updated Lync recording feature nearly useless.”
• “I like the mp4 format, but I need to CONVERT some Lync recordings to WMV for upload to an older streaming media server.”
• “The 10 fps frame rate is not necessary for sufficient quality.”
• “The Lync recording size is so large it is proving impractical to post to our central SharePoint site.”
• “Colour matching is way off, significant colour banding, obvious ghosting of text and hard edges.”
After trying lots of screen recorder, I finally found a useful program to record Lync meeting (also suitable for record Lync call and record Skype for Business meeting) in high quality without above limitations.
Get a Powerful Lync Meeting Recorder Here
VideoSolo Screen Recorder might be the best tool to record Lync meeting efficiently, convert to various formats, adjust the video frame rate and reduce size without losing its quality. It captures all your screen movements including images, system sound and microphone sound, record high-resolution Lync meeting the same as your computer screen resolution. The video frame rate is configurable from 20fps to 60fps. This recorder balance between recording quality and recording size, it’s really easy for you to post and share the Lync meeting.
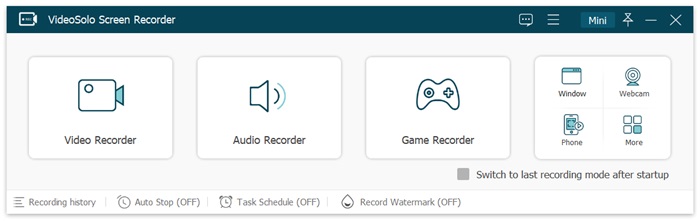
Step 1. Click "Video Recorder" On the Main Interface
Enter into the clean main interface, press “Video Recorder” option to record both video and audio of a Lync meeting.
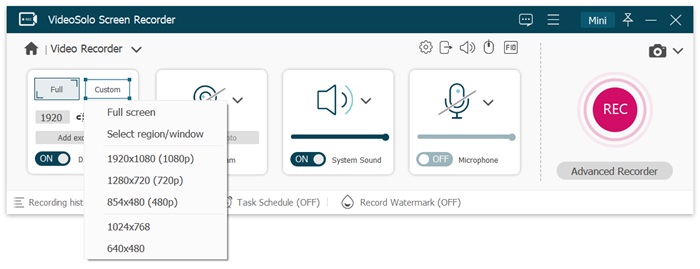
Step 2. Select Video Recording Region
To record the full Lync meeting, you should determine the recording region first. You can select full screen, fixed region or customize it. By the way, if you just want to record the Lync window but not all the operations on your computer screen, using “Lock window” function will be a great choice: click “Lock window” first then select the opening Lync window from the dropdown list.
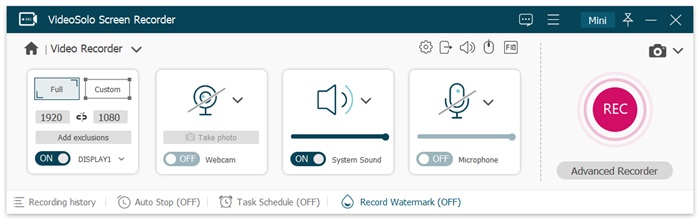
Step 3. Adjust Volume of Lync Meeting Recordings
Now adjust the volume of system sound and microphone sound to get a clear Lync recording. After that, hit the “gear” icon. We are going to adjust the output formats and frame rate.
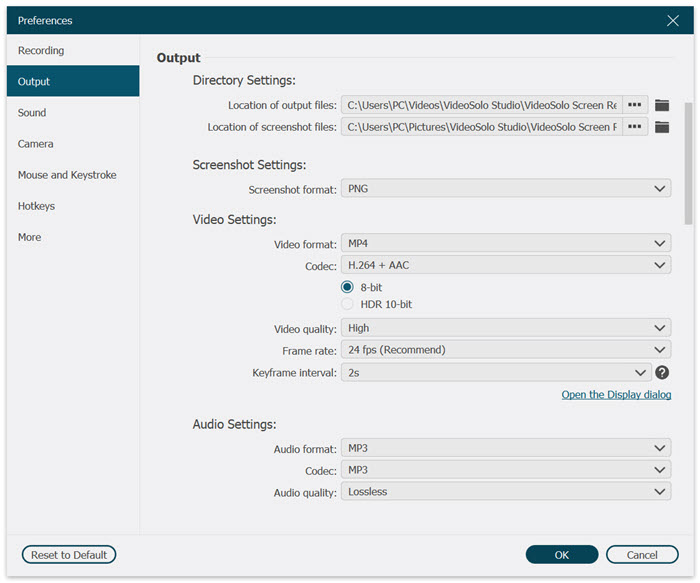
Step 4. Modify Output Format and Frame Rate
In this “Output” tab, you can select output formats from WMV, MP4, MOV, F4V, AVI, TS, Gif, choose the video quality and adjust video frame rate. Generally, “20fps” will be enough to record a Lync meeting.
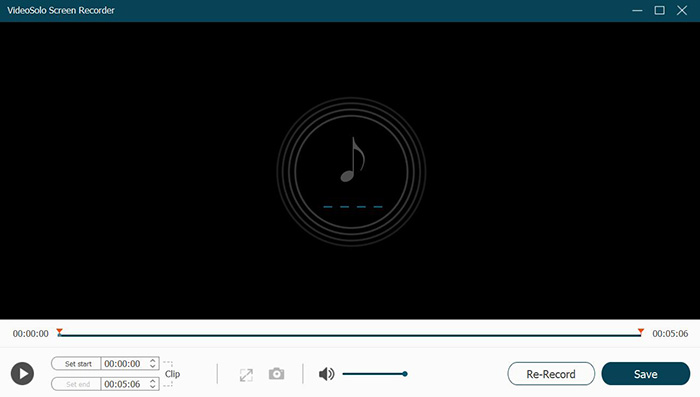
Step 5. Start Your Lync Meeting Recording
Back to the Video Recorder interface to click “REC”, the recording starts. You can control the recording process with hotkeys. After recording, just preview and save it. The recording will automatically compress but basically, keep its original high quality.
VideoSolo Screen Recorder can fix all the recording issues that mentioned at the beginning of this article: low resolution and frame rate, monotonic output format, too-large recording size and a series of video quality issues. It is really an extremely simple, powerful and pretty software to help you record Lync meeting with no hassles at all. You are welcome to get it right now.