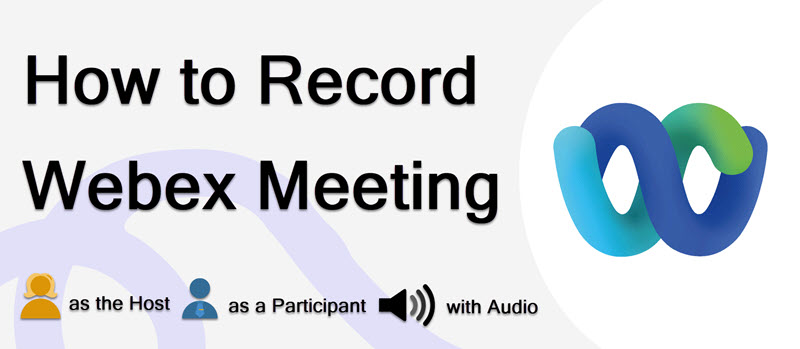
How to Record Webex Meeting in 2024 [6 Methods]
- Karen Nelson
- April 17, 2023

Download Screen Recorder For FREE!
Sometimes you need to record a Webex meeting with audio clearly for further reference. But you may not know how to make it in the best way as a meeting participant. No worries. In this article, there will be 6 workable methods for you to record Webex meeting with audio on any device. Just read on!
How to Record Webex Meeting as a Participant on Windows/Mac🔥
Usually, only the host and cohost are admitted to record a Webex meeting. If you want to record Webex meetings as a participant without permission, you may need VideoSolo Screen Recorder. You can use this screen recorder to capture any on-screen activity along with both microphone sound and system sound lossless.
Besides, VideoSolo uses advanced hardware acceleration technology to help keep long-time and lag-free recording during a Webex meeting.
VideoSolo Screen Recorder
- Record your webcam, microphone, and system sound together.
- Capture any area of your computer screen in up to 4K 60fps.
- Support adding real-time annotations while Webex recording.
- Task schedule to help you record oncoming Webex meetings.
- Advanced editors to cut, trim, and compress your recording.
Windows 11/10/8/7/Vista/XP; macOS X 10.7 or above
Here are the instructions on how to record Webex meeting with VideoSolo Screen Recorder:
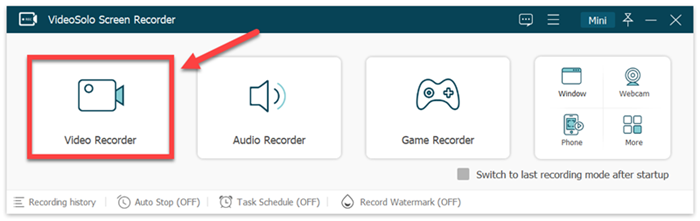
Step 1. Launch VideoSolo Screen Recorder and Select "Video Recorder"
Download, install, and launch VideoSolo Screen Recorder on your Windows PC or Mac. Choose “Video Recorder” mode to record Webex meetings.
Step 2. Set the Recording Area and Volume
After that, you can select the recording area. Click “Select region/window” and then choose Webex. Thus, only the meeting window will be recorded.
Besides, you are recommended to test and adjust the “System Sound” and “Microphone” volumes before the Webex meeting starts to ensure you record Webex meeting with audio.

Step 3. Start to Record Webex Meeting When It Begins
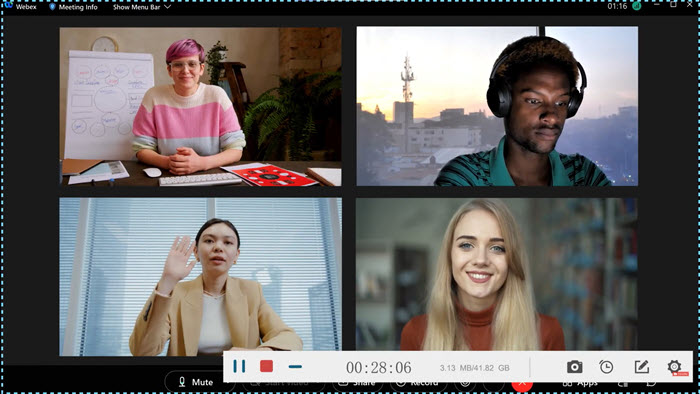
When the Webex meeting begins, simply click the “REC” button. The program will start to record Webex meeting without permission of the host. During the recording, there will be a floating panel for you to add text, shapes, etc. for highlighting the Webex recording or making notes.
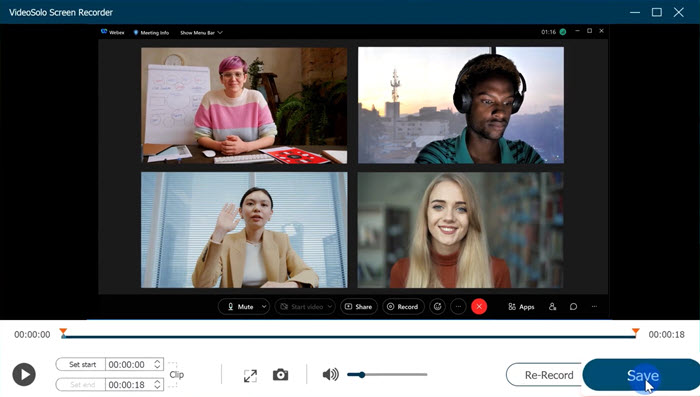
Step 4. Save the Webex Meeting Recording
Stop recording when the Webex meeting ends, and then you can preview and edit the Webex screen recording. Click “Save” to keep the Webex meeting recording on your computer drive.
Watch the full video tutorial below to learn how to record Webex meeting without permission via VideoSolo. Besides, if you want to record webinars apart from Webex, VideoSolo also helps you well.
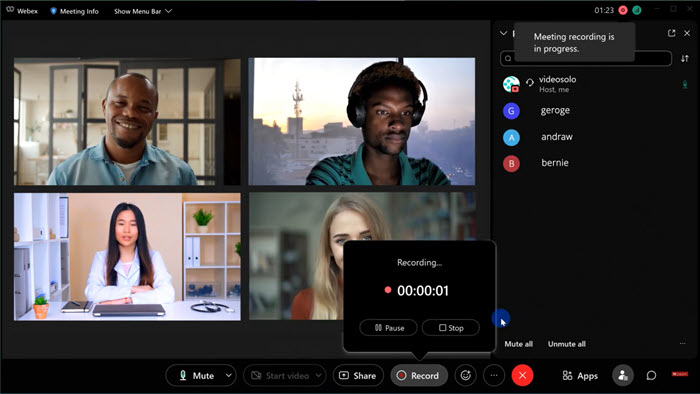
How to Record Webex Meeting as the Host (Official Method)
If you are the host or cohost of a Webex meeting, you can use the built-in recording feature of Webex to record the meeting. Here come the steps:
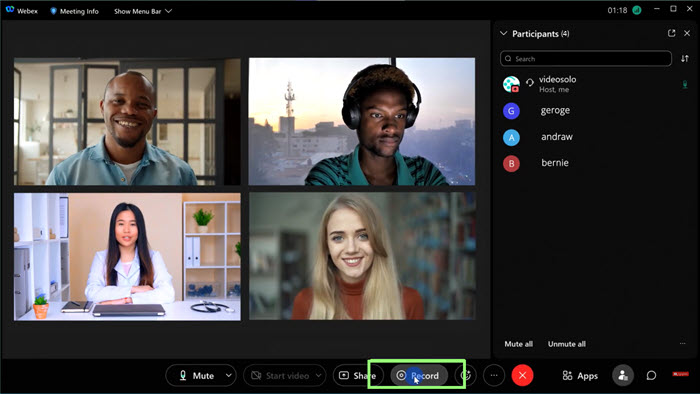
Step 1. As a host or cohost, you will see the “Recorder” icon show up in your session control panel. Click it and a menu will appear.
Step 2. Click “Record in cloud” to save the Webex recording in the cloud, or click “Record on my computer” to save the recording on your computer drive.
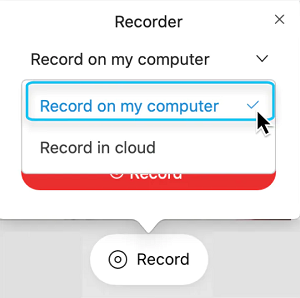
Step 3. After selecting, a red “Record” button will appear. Click it and the Webex recording will begin. When the Webex meeting is over, hit the “Stop” button to end the recording process. The recording will be automatically saved to your selected location.
This method is provided by the official, which is safe and smooth, but it has some limitations. You have few customization settings or features available, and if you are a participant, you have to contact the host to get permission. If you want to avoid setbacks, using VideoSolo Screen Recorder is a good choice.
How to Record Webex Meeting for Free with Online Tools
Apart from VideoSolo Screen Recorder and Webex’s built-in recording feature, you can also choose a lightweight browser extension or online recorder to record a Webex meeting.
Method 1. Record Webex Meeting with Chrome Extension
Screencastify is a lightweight Chrome extension to record and share videos. It can easily record Webex meetings for you.
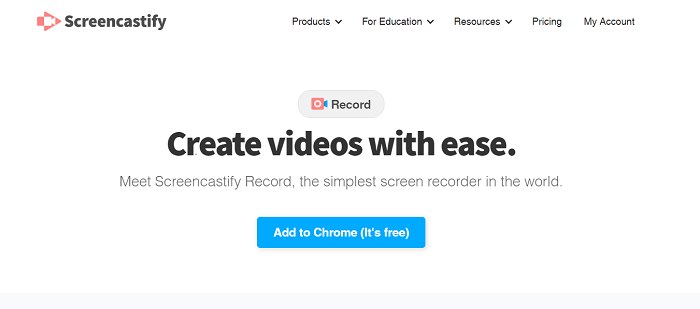
Step 1. Add Screencastify to your Chrome browser.
Install Screencastify on your Chrome browser. It works both on Windows and Mac.
Step 2. Launch Screencastify and choose the recording area.
Click the “Extension” button on the top right corner of your Chrome browser. Click to launch Screencastify, and choose Desktop to record Webex meeting.
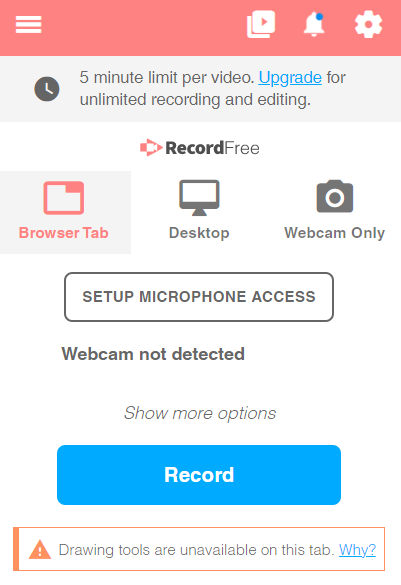
Step 3. Start Recording Webex Meeting
Click “Record” when the Webex meeting begins.
Step 4. Export the Recorded Webex Meeting.
After clicking “Stop Recording“, it will jump to a new tab for editing video, and then you can save the Webex meeting recording in WebM format.
Method 2. Record Webex Meeting with Online Screen Recorder
AceThinker is a free online screen recorder that can record audio and video to create the perfect screen recording. It is also a great tool for recording your Webex meeting.
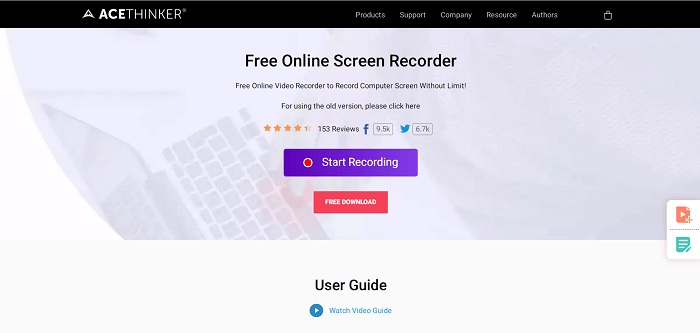
Step 1. Open AceThinker Online Screen Recorder
Open AceThinker in your browser. To start recording, you need to download AceThinker Launcher first.
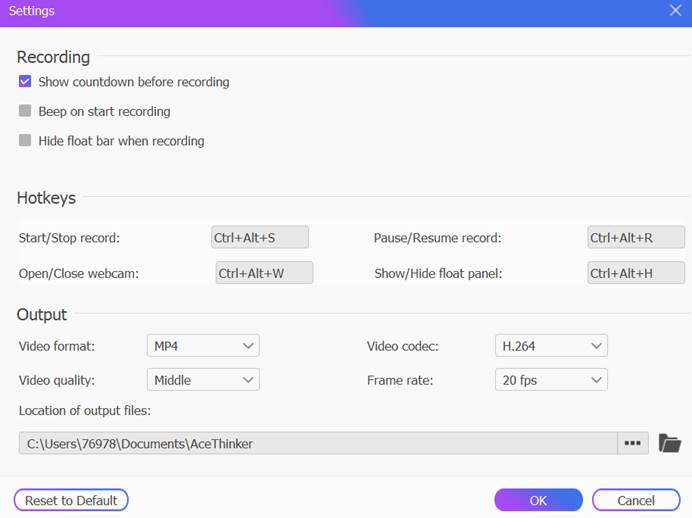
Step 2. Customize your recording settings
You can click on the Gear icon to configure some general recording settings like bitrate, audio quality, output format, frame rate, etc. based on your preferences.
Step 3. Start recording Webex meeting
Click the “Start Recording” button when your Webex meeting begins. After recording, you can preview your newly created video clip and decide where to keep it on your computer. If you don’t need a highly-personalized recorded file, this method is helpful.
How to Record Webex Meeting on iPhone/Android
Sometimes you may need to record a Webex meeting on your phone. Here we will introduce 2 other ways to do it on your iPhone/Android.
Method 1. Webex Recoding via iPhone Built-in Recorder
Step 1. Check if there is a Screen Recording button in your Control Center. If there is, go to Step 2. If not, go to Settings > Control Center > Customize Controls, and find “Screen Recording” from the list option. Then press “+” to add it to your iPhone Control Center.
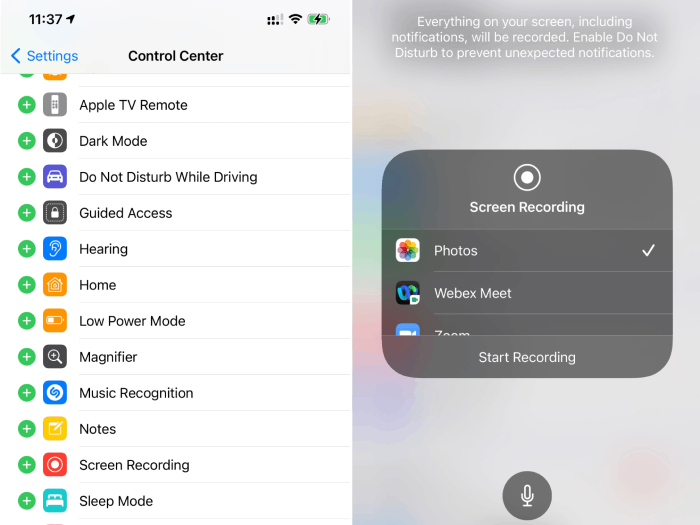
Step 2. Launch Webex meeting on your iPhone. When the Webex meeting begins, go to Control Center and tap the Screen Recording button. Remember to turn on the microphone.
Step 3. When the Webex meeting is over, press the “Screen Recording” button again to stop recording. You can check your recorded file in the Photos app on your iPhone.
Method 2. Webex Recoding via Cisco Webex Meetings
Similarly, it is also possible to record a Webex session on your Android, iPhone, or iPad via Cisco Webex Meetings app. Here are the brief steps.
Step 1. Open the Webex app on your device and join a meeting.
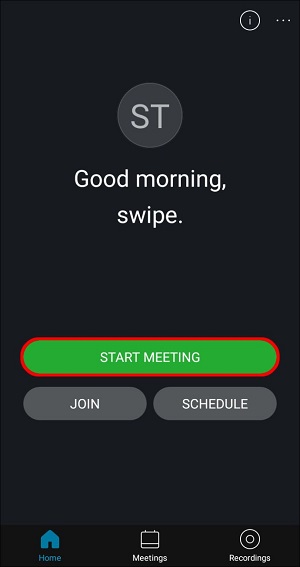
Step 2. If you have the right to record the meeting, you can directly click the provided Record button at the bottom, and the recording will start.
Step 3. When the meeting is over, check your Webex recording in the Recordings tab.
Overview Comparison of the 6 Ways to Record Webex Meeting
Here is a chart for you to compare the core features and performance of these 6 Webex meeting recorders.
| Area Selection | Record Webcam | Scheduled Recording | Editing Tools | Output Quality | Output Format | |
| VideoSolo Screen Recorder | ✔️ | ✔️ | ✔️ | ✔️ | Lossless | WMV, MP4, MOV, AVI, F4V, TS and GIF |
| Webex Built-in Recorder | ❌ | ❌ | ❌ | ❌ | High | High |
| Screencastify Browser Extension | ❌ | ✔️ | ✔️ | ✔️ | High | WebM |
| AceThinker Online Recorder | ❌ | ❌ | ❌ | ✔️ | High | AVI, MOV, WMV, FLV and MP4 |
| iPhone Built-in Recorder | ❌ | ❌ | ❌ | ✔️ | Middle | MP4 |
| Webex App for Mobile | ❌ | ❌ | ❌ | ❌ | Middle | WRF |
FAQs About Recording Webex Meeting
Here are some frequently asked questions about Webex meeting recording. Hope they are helpful.
Who can record Webex meeting? Can I record Webex meeting as a participant?
How to record Webex meeting with audio only?
Sometimes you may only want to record the sound of the Webex meeting without images. However, Webex does not provide such a feature. To record Webex meeting with audio only, you can use the Audio Recorder of VideoSolo Screen Recorder to record computer audio.
Where does Webex Recording Get Saved?
On both Windows and Mac, there will be a default recording location to save your Webex meetings. All the recordings will be saved in MP4 format.
On Windows: The Webex meeting recordings will be saved in the “Documents” folder inside “My Computer”.
On Mac: The Webex meeting recordings will be saved in the “Home” folder in “Finder”.
If you want to save the recorded files in other formats, you can try VideoSolo Screen Recorder we mentioned above.
Final Words
The article has taught you how to record Webex meeting as a participant without permission on different devices. You can choose a third-party downloader, Webex’s built-in screen recording tool, or a lightweight Chrome extension recorder depending on your needs. VideoSolo Screen Recorder must be the best choice for its high-quality and lag-free Webex meeting recording. Just click the download button and try it now!