Best Way to Rip DVD to Computer (Fast!)

BD-DVD Ripper
There are lots of users got stuck while finding a program to rip DVD to computer. You may want to rip DVD first on the computer then transfer it to watch on other devices, or because of owning an encrypted commercial DVD for that region so you cannot view it at all. Under such cases, a DVD ripper is necessary. However, with variegated DVD ripper programs on the web, how to find one that is really stable and fast?
Well, here's the right page for you because I am going to walk you through my all-time favorite method to rip DVD to computer: Using VideoByte BD-DVD Ripper. It offers the ability to re-encode the DVD content and transfer it to 300+ video and audio formats. It's also available to clip, edit, and add 3D effect before the ripping process. Download it and keep watching, you won't be disappointed with it.
Rip DVD to Computer on Mac/Windows Computer
Have you already installed VideoByte DVD Ripper? If you have, let's begin action in step-by-step ripping DVD to computer.
Note:
The Windows version of VideoByte BD-DVD Ripper released a new version which has big changes compared with the old version. But the new version for Mac is still under the development. That means the interface and the operation of Windows and Mac will be different.
To know the details about the new version, you can read on the article: A New Version for BD-DVD Ripper (Windows) Released! See What Changes
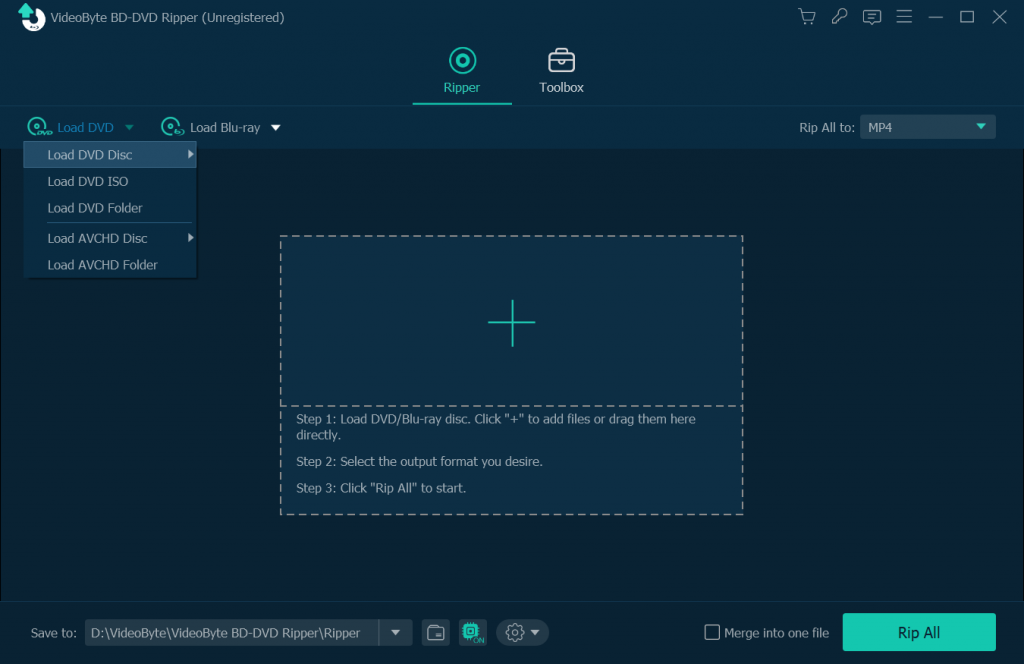
Step 1. Load DVD Disc/DVD folder/IFO file
Load DVD disc from your computer's DVD drive or import DVD files into the program. Input files supported DVD folder and ISO file.
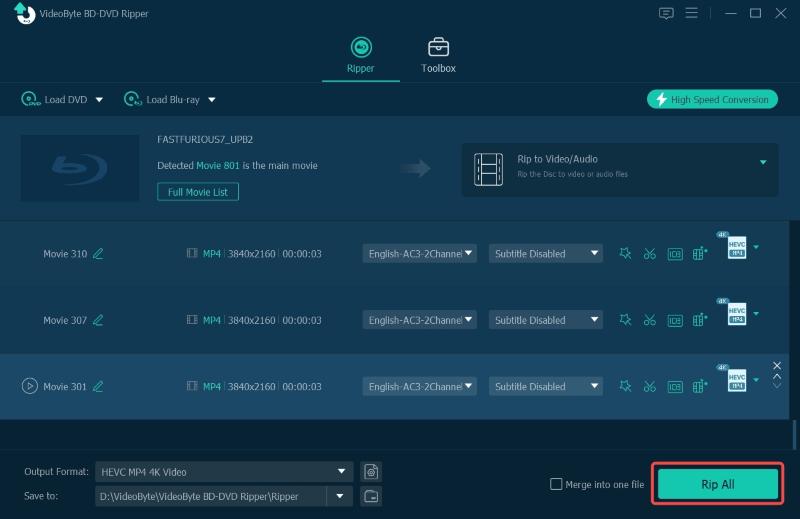
Step 2. Choose Output Format That Fixes Your Device
Select the output format for your device that you want to play. It covers more than 300+ output formats including common video formats and HD video formats.
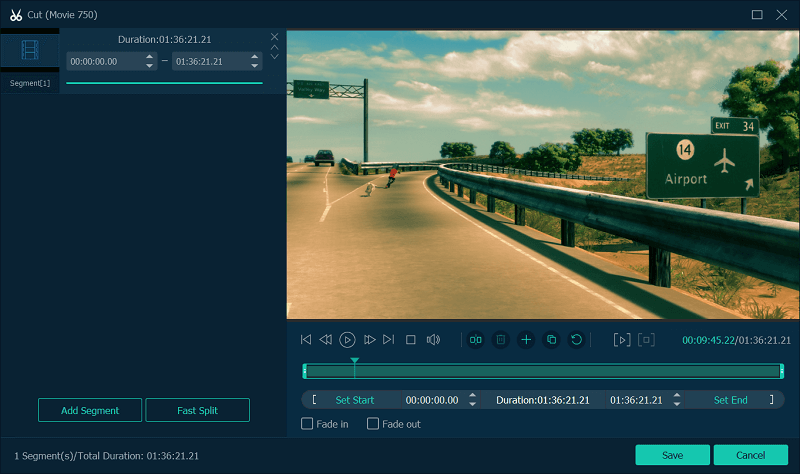
Step 3. Clip and Edit DVD Video before Ripping
Clip, edit and add effect are available in this DVD ripper. For example, click "Cut" icon in the main interface and drag two horizontal sliders to select the clip you want.
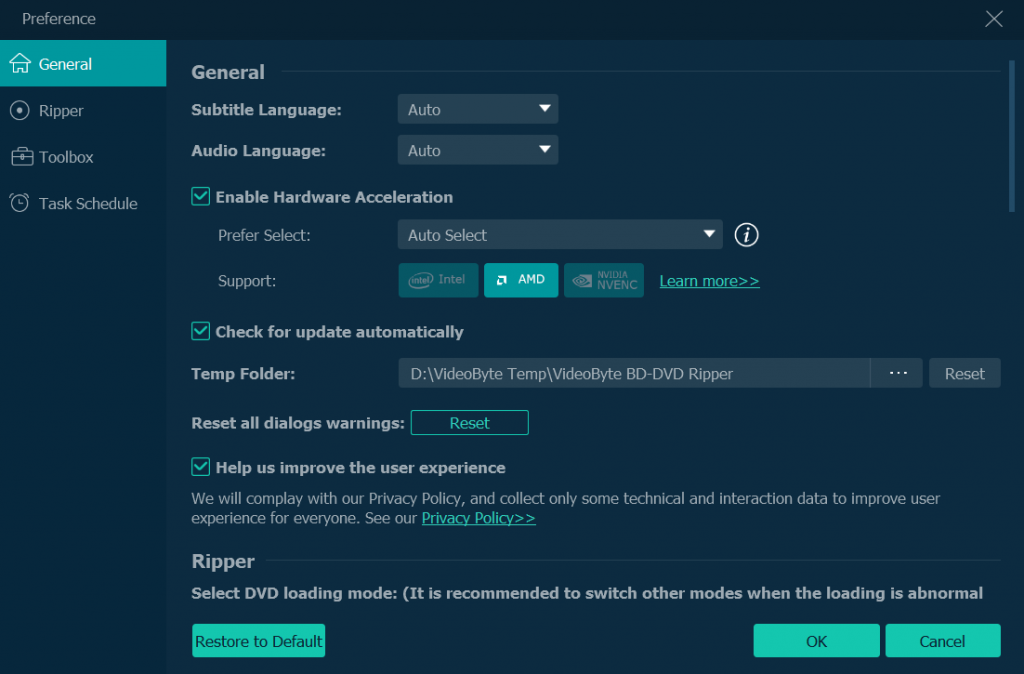
Step 4. Enable Hardware Acceleration Then Convert
Click menu on the upper right corner to pop up the "Preferences" window. Then you can enable hardware acceleration according to your computer's graphics card. When everything is all set, click "Rip All" to rip DVD to computer.
The above uses a Windows computer to give an example. View How to Rip Blu-ray to Mac to learn how to transfer BD/DVD to Mac computer.
Why You Need Using Hardware Acceleration to Fast Rip DVD
Hardware acceleration is the use of hardware modules to replace software algorithms. This makes full use of the fast features inherent in hardware so it's usually more efficient than software algorithms. If you have a large collection to digitalize, hardware acceleration will boost the ripping and converting process, which help you finish the task in super-fast speed, and this is what VideoByte DVD Ripper support: multithread and multicore hardware acceleration. No matter what graphics card you are using: Intel, NVIDIA or AMD, VideoByte can automatically detect it.
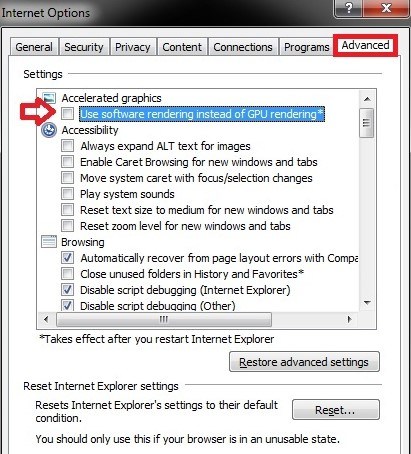
Your computer must allow hardware acceleration before VideoByte uses it. It is enabled by default. But if you want to confirm,open Control Panel > Network and Internet > Internet Options > Advanced > Accelerated graphics. "Use software rendering instead of GPU rendering" should be unchecked.
So this is my all-time favorite method as well as one of the best ways to copy DVD to pc. It is fast because of the excellent software algorithms & hardware acceleration. Is this article useful for you? How do you think about VideoByte DVD Ripper? You are welcome to leave the comments below.
Hot Articles