How to Use Windows 10 Built-in Tool [Overall Guide]
- Karen Nelson
- December 21, 2022

Download Screen Recorder For FREE!
When you want to record tutorial videos, make a copy of an online meeting, or show off your fantastic gameplay on Windows computers, many people are torn about which screen recorder is more suitable. Before trying to use a third-party screen recording software, you may want to try the Windows 11/10 built-in screen recorder first to see if it’s right for you, because after all, this built-in tool doesn’t require any other software to be installed and it’s totally free!
This tutorial will explain how to use Windows 11/10’s built-in screen recording feature, which called “Xbox Game Bar”, to capture your computer screen and perform computer recording.
Find and Turn on Windows 10 Built-in Screen Recorder Xbox Game Bar
Windows seems to know exactly what people need. When there are more users requiring a screen recorder in daily life, the Windows 10 built-in screen recorder appears. As what’ve been mentioned, the built-in screen recorder on Windows 10 (the Game Bar) is produced as part of the Xbox app for providing the gameplay recording, which is entirely free of cost. In the newly launched Windows 11 system, this feature will be kept so people get an easy and free way to record Windows screens without downloading other apps. Now the only problem is how to find and turn on this built-in Windows 10 screen recorder. Here, you will get an explanation.
Step 1. Open the Windows menu in the bottom left corner of the computer screen.
Step 2. Click the “Settings” button and choose to enter “Gaming” in the window that pops up.
Step 3. Find “Game Bar” from the list and then turn the option “Record game clips, screenshots and broadcast using Game Bar”.
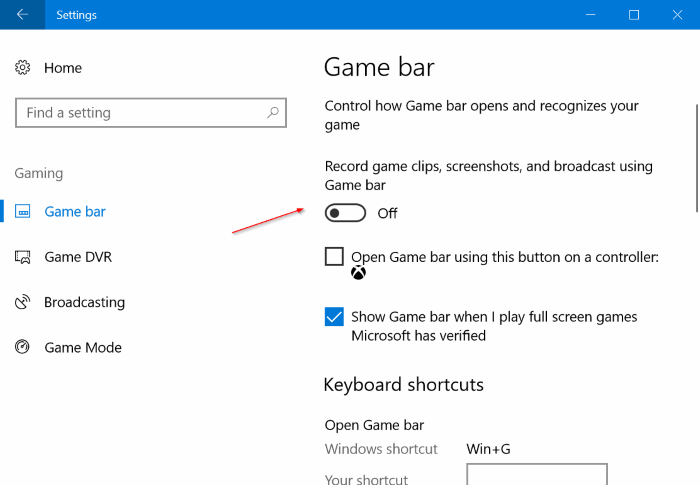
When this option is turned on, you can start recording your computer screen using the Xbox Game Bar on Windows 10. The next is the using procedures.
How to Screen Record on Windows 10 Freely with Built-in Xbox Game Bar
After finishing the preparation to enable Windows 10 built-in screen recorder before starting the first recording mission, the rest of the operation is very simple. Just follow the steps below.
Start Recording Your Screen with Windows 10 Game Bar
Step 1. Press the keyboard shortcut “Windows + G” at the same time. Then the Game Bar will be opened.
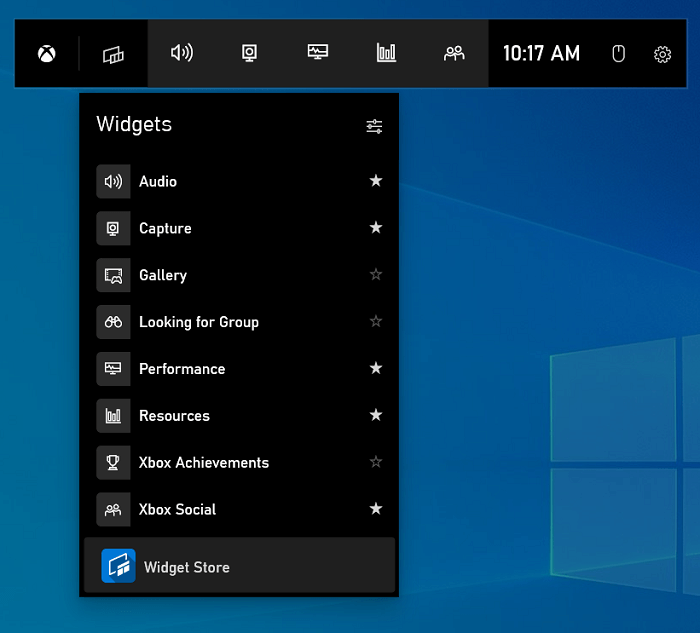
Step 2. (optional) If you see a pop-up window prompting “Do you want to open the Game Bar?”, whether you are recording a game or not, you will need to check “Yes” to bring up the recording feature.
Step 3. Directly click the recording icon provided on the Game Bar and the screen recording will start. By clicking anywhere else, the Game Bar will be hidden without annoying the whole recording outcome. You can also turn on the microphone to record your voice.
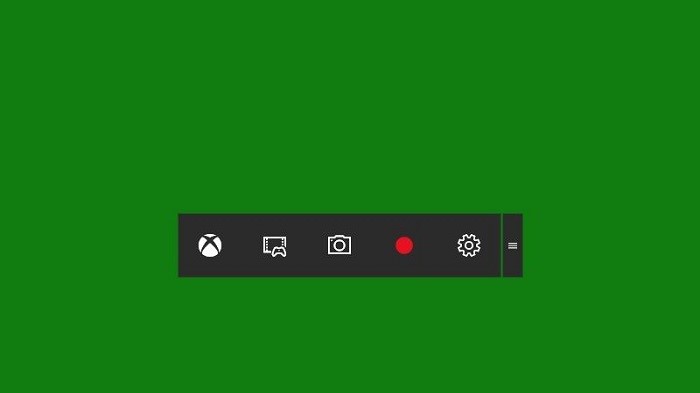
Step 4. When you need to stop recording, click the icon again on the function bar. Then a notification will appear to notify you that the video has been saved. If you click the notification window, you will be brought to the folder where your computer saved the recording for you. Normally, the recorded video will be stored in the “Video” folder of the “User” folder of C drive.
Keyboard Shortcut for Windows 11/10 Built-in Tool Screen Recording
Once you get used to using the Windows built-in recording tools, you can use shortcut keys to record your computer screen faster and more efficiently.
Windows + G: Open “Xbox Game Bar
Windows + Alt + G: Record the last 30 seconds (you can change this time in Settings)
Windows + Alt + R: Start/Stop Recording
Windows + Alt + B: Enable or disable HDR
The benefits to use Windows 10 built-in screen recorder are obvious. You don’t need to download another software and pay for them. Yet, as an elementary recording tool, it contains disadvantages and some limitations. For instance, this tool can only record a single window of your screen. When you switch the screen, the recording will automatically end, and cannot record the system operations, only for software or games capture. Besides, it doesn’t provide flexible recording settings or any editing functions.
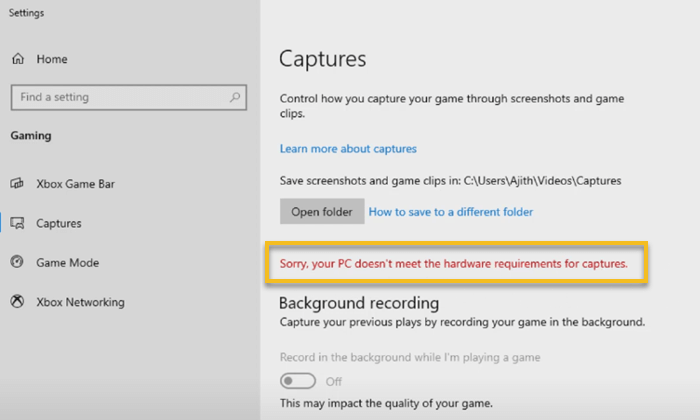
In addition, this feature also has some restrictions on the specifications of the computer. The “graphics card” in the computer only meets certain specifications of AMD, NVIDIA or Intel to use the built-in recording feature of windows 10, otherwise when you try to use this feature, you will see the “Sorry, your PC doesn’t meet the hardware requirements for captures.” prompt. Also, the Xbox Game Bar, the free recording program built into Windows 10, does not open from time to time.
Of course, you can still use Xbox Game Bar if it meets your expectations. But if you want to find a better alternative, we’d also like to introduce one to you. Just keep reading.
Best Alternative to Record Screen on Windows 10 Without Xbox
As mentioned, a way to solve the negative sides brought by Windows 10 built-in screen recorder is to find an alternative to use from the best screen recorders for Windows 10. And the best alternative to the Game Bar for getting a high-quality Windows screencast should be VideoSolo Screen Recorder, which can help you fix all the problems when you encounter when using Windows 10 built-in screen recorder.
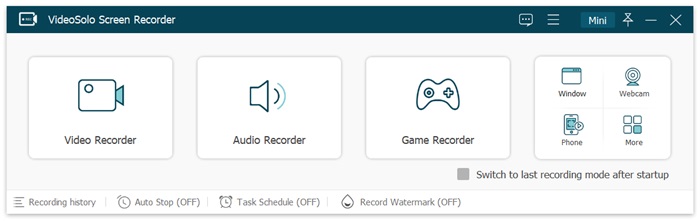
VideoSolo Screen Recorder is a desktop recording app, which supports both Windows and Mac systems. It provides different modes for users easily recording any part of the screen activities, such as the videos, audios, microphone sound, and webcam. It is also developing the iOS recording function so that users can use this app on iOS phones or pads for capturing their screen with high quality. In the next, let’s see the main features of this powerful screen recorder.
Now, let’s see how to use VideoSolo Screen Recorder for recording your screen on Windows 10 (Windows 11 also supported).
Step 1. Install the Screen Recorder
Choose the Windows version for installing the screen recorder on your Windows 10 now.
Step 2. Recording Setting
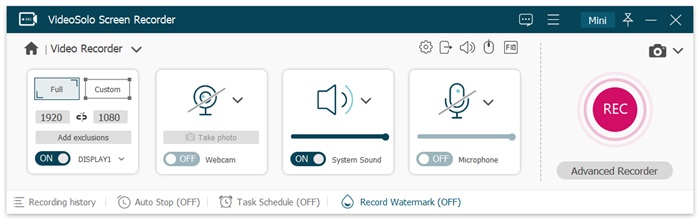
When VideoSolo Screen Recorder is installed, open it and enter the “Video Recorder” mode. You can change the size of the recording area, turn on the webcam, or adjust the volume of the microphone and system sound. There are more advanced recording settings provided under the REC button just by clicking the “Advanced Recorder” button.
Step 3. Preferences Setting
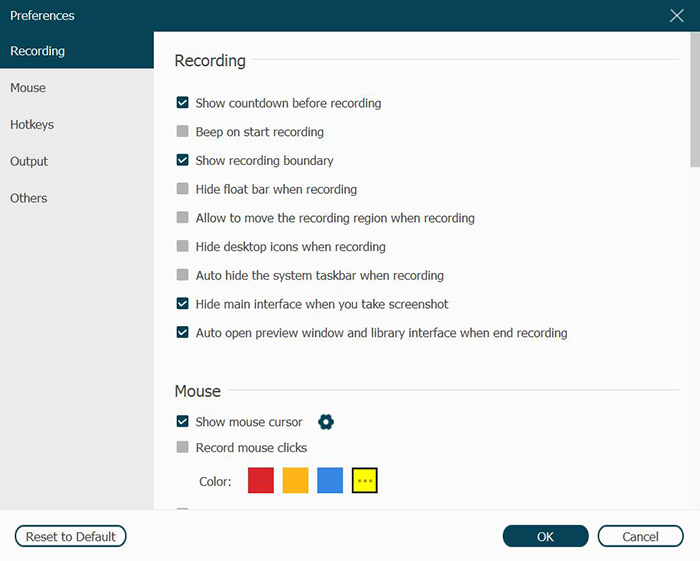
By clicking the setting icon offered above the microphone setting, you will enter the “Preferences” window to make more recording settings.
Step 4. Control the Recording
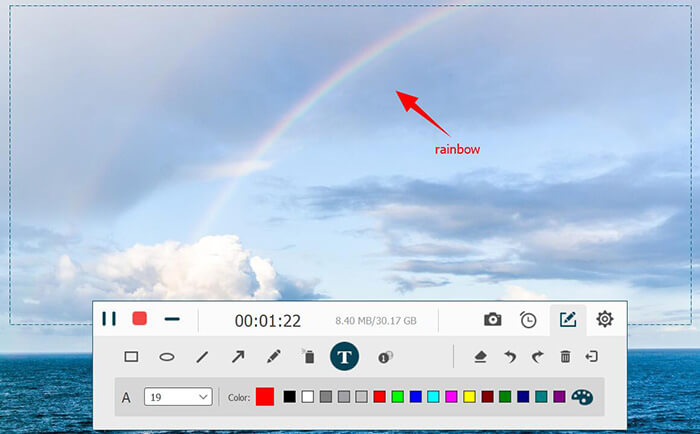
When things are ready, come back to the video recorder and directly control the recording to start by pressing the “REC” button. During the screen recording, you can use the drawing panel to do real-time editing.
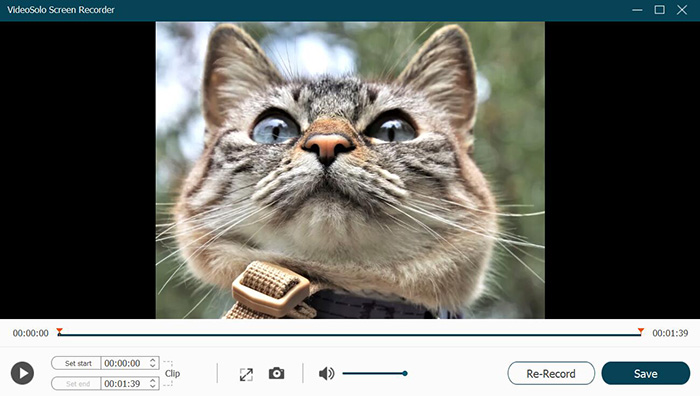
Step 5. Save the Recording
Finally, click the “REC” button again to stop the recording and you will be moved to the preview window. You can trim the video here, and directly hit the “Save” button for saving the recording.
More Advanced Features of Windows Screen Recorder VideoSolo
As we can learn, VideoSolo Screen Recorder can bridge the gap of Windows 10 built-in screen recorder, such as providing more recording settings, changeable shortcuts, the ability to edit recordings, and so on. In the next, let’s see the main features in detailed of this powerful screen recorder.
- HD Quality
VideoSolo Screen Recorder will keep the recording quality at its best state. It can save the output videos with the best HD quality, so no matter what activities you try to record with VideoSolo, you will get the HD recordings for having enjoyable later playback.
- Flexible Recording Modes
VideoSolo Screen Recorder offers a video recorder, audio recorder, webcam recorder, game recorder modes for people to capture different screen activities within one app. It also supports recording locked window so that you can deal with other desktop tasks while recording without disturbing it.
- Changeable Shortcuts
To better control the recording, VideoSolo Screen Recorder provides options people to change the shortcuts for starting or ending the recording based on their own keyboard using habits.
- Scheduled Recording Setting & Auto Stop
If you are going to record a long video, VideoSolo Screen Recorder also offers a schedule recording & auto stop function function to let you preset the start and endpoints for recording. When you turn it on, the recording will begin and end at the time you set without controlling the app by yourself.
VideoSolo Screen Recorder brings many benefits to help record Windows and Mac screens with a better user experience. Although it is a seemingly simple screen recorder, it contains the most useful tools we may need during the screen recording process. If you’d like to have a try, free download it here:
FAQs About Recording Screen on Windows 10 and the Built-in Tool
Here we have collected some questions that users often ask when using the Windows 11/10 built-in screen recorder, hoping to help you better understand the “Xbox Game Bar” PC screen recording feature.
Why is there no sound on the Windows 10 video recording?
When you are recording on the Xbox Game Bar and finally find that there is no sound on the exported video, there are two possible reasons for this.
Windows does not grant permission for Xbox Game Bar to use microphone
The Xbox Game Bar does not have audio recording enabled
You can follow the steps below to turn on Xbox Game Bar microphone permissions in the System panel.
For Windows 10
Click the “Windows” icon to open the menu and go to the “Settings” panel
Click “Privacy” > “Microphone”
Find “Xbox Game Bar” and enable “Microphone”
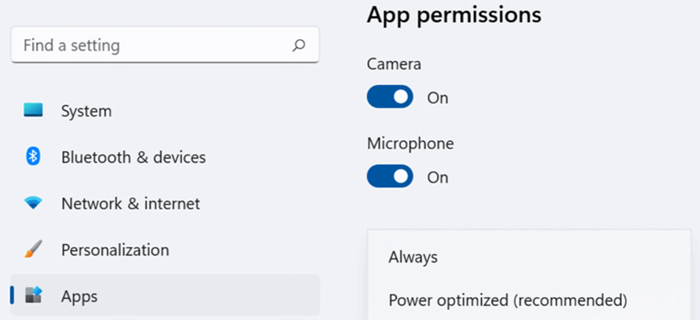
For Windows 11
Click the “Windows” icon to open the menu and enter the “Settings” panel
Click “Applications” > “Applications and Features”
Find “Xbox Game Bar” > “Advanced Options” and enable “Microphone”
Then, go back to the Xbox Game Bar and check the audio settings.
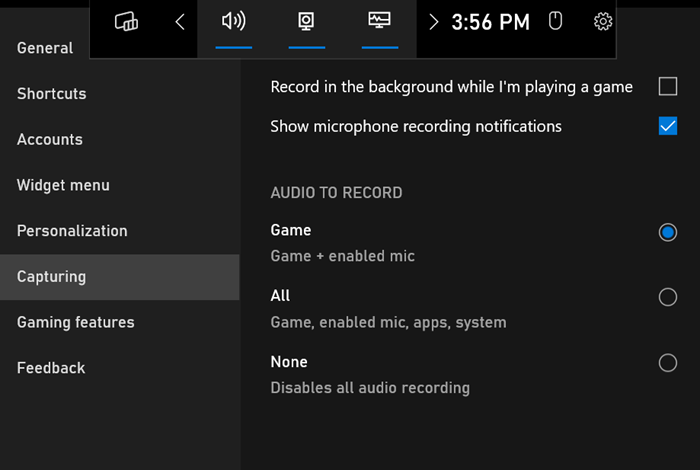
Use “Windows + G” to access the Windows built-in screen recording tool
In the upper menu bar, click on the Settings icon
Click “Capturing” > “Audio to Record”
Select “Game”, “All” or “None” according to your audio recording needs
How long can Windows 10 built-in screen recorder record?
With Xbox Game Bar, you can record your computer screen for up to 4 hours at a time.
Can I pause and resume recording during screen capture process?
The Xbox Game Bar in both Windows 10 and Windows 11 does not have the ability to resume recording after a pause. If you click on the pause icon, the program will automatically stop and then start saving the current video and you will need to start a new recording again.
Does Xbox Game Bar have a schedule screen recording feature?
Many gamers want to set the start and ending time in advance to record custom clips so that they can save the time of editing the video later on. However, Windows 11/10 built-in screen recording tools do not offer this advanced feature.
Conclusion
Xbox Game Bar is convenient for Windows 10/11 users. And if you’re looking for a PC screen recording software that can start and end recording automatically with a preset time, try VideoSolo Screen Recorder, which offers a variety of customization options for both the capturing area and the video recording time, so that screen recording is not limited!